How I Used Planoly to Market My Book Release

 Isn’t this cool?!?
I use Planoly to schedule Instagram posts. I LOVE it. It makes everything easier. And by “everything” I mean “I don’t wake up dreading knowing that my first todo item of the day is Post To Instagram.”
Instead of waking up in a cold sweat wondering how I’m going to motivate the world with an image I don’t yet have and a fantastic quote I haven’t written, I sit down for a few hours and have a dedicated Instagram planning session.
It.
Is.
Epic.
What exactly do I do?
Lemme tell you using a specific example.
A few months ago, I wanted to publish a series of posts as a countdown of sorts until the day of my book release.
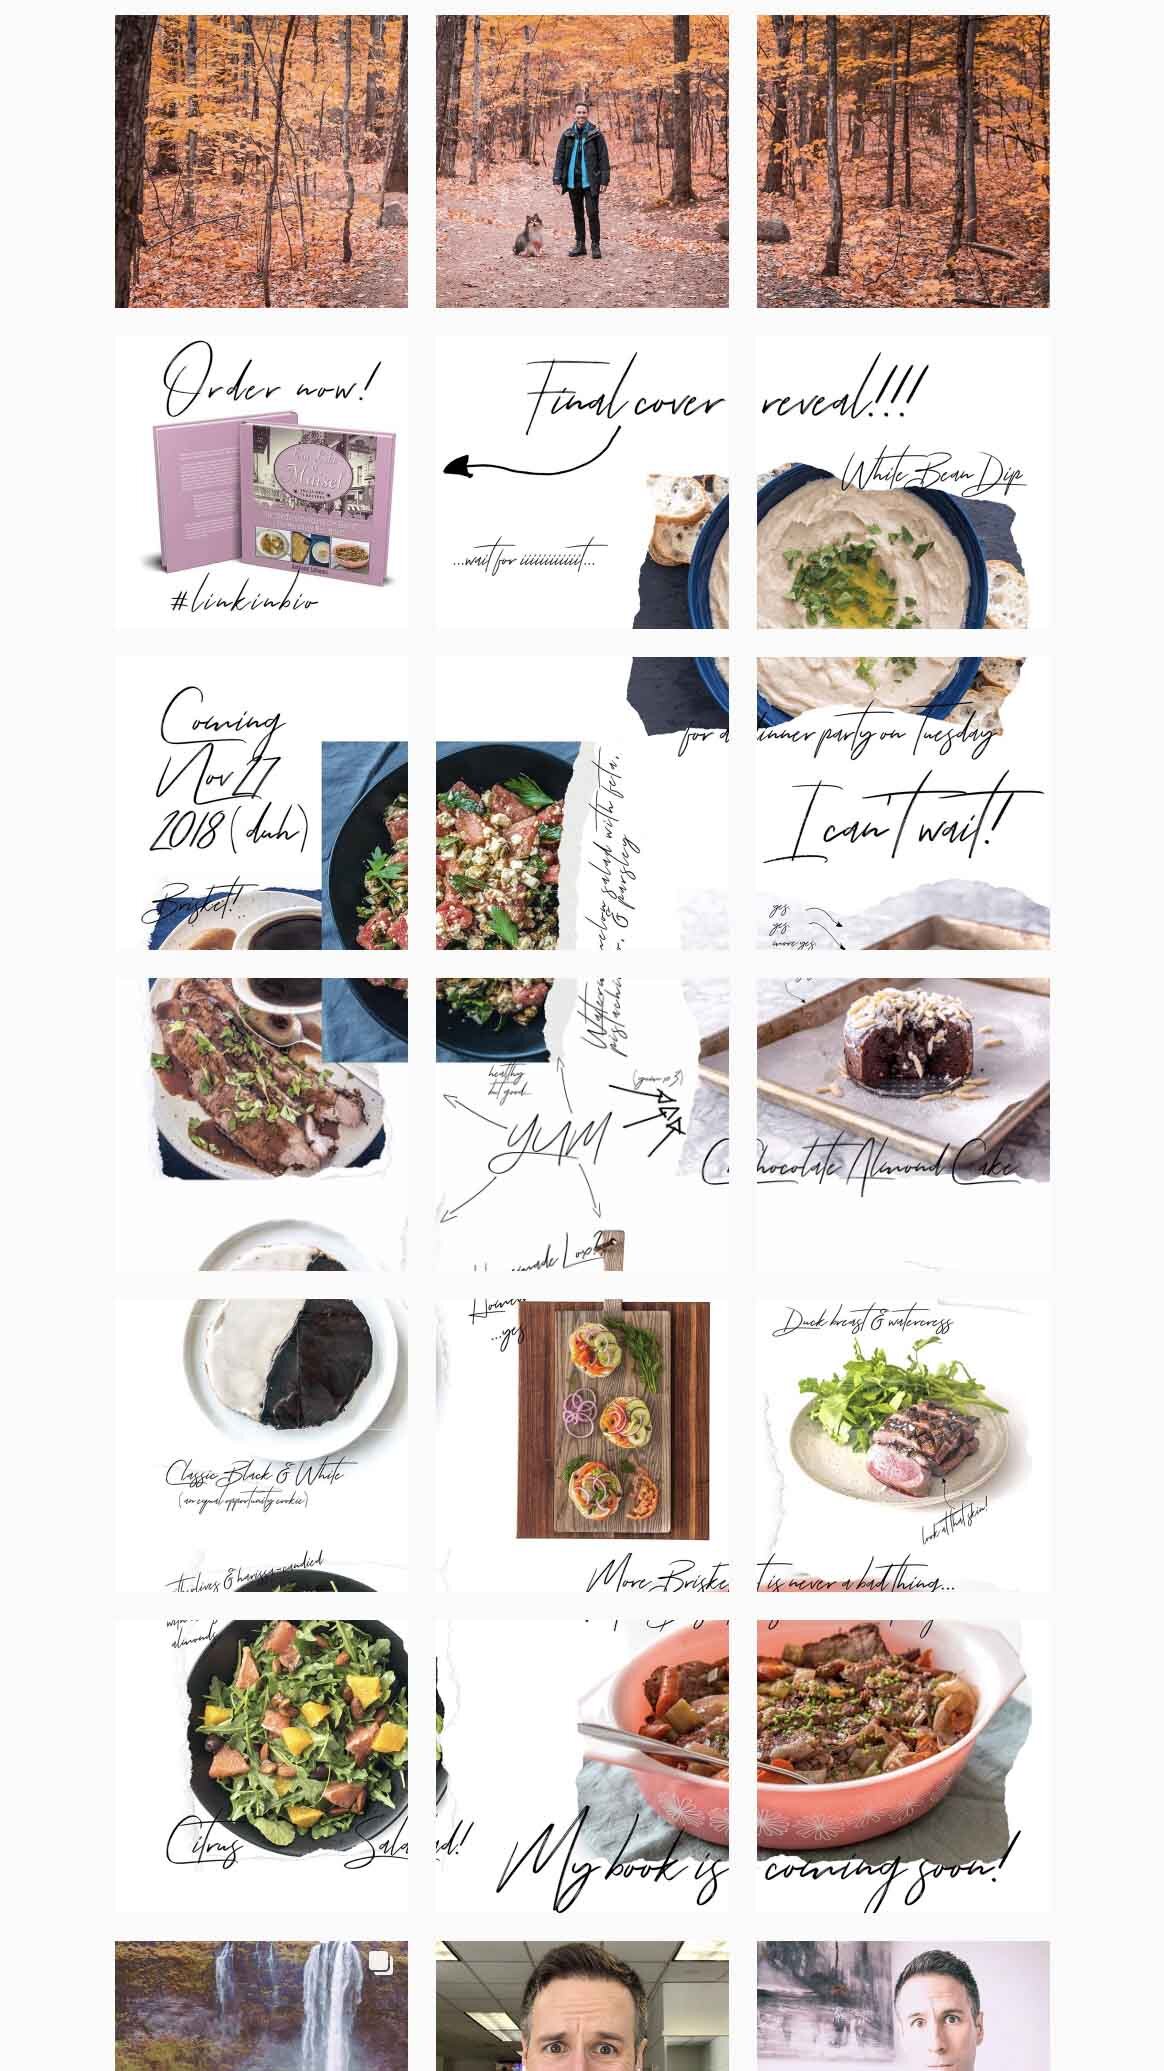
I planned and scheduled 15 posts featuring recipes from the book. I opted to do a "puzzle", where images and text straddle Instagram's diving lines. You can keep things simple and not do this.
Or you can do it.
Your call.
I liked it because it looks SO cool once all the images are on the grid.
Here’s a down-and-dirty primer on how to schedule sweet Instagram content like this…
Note: You’ll need to switch your Instagram account to a Business profile to use auto-posting with Planoly. Check out Planoly’s instructions on that here.
1. Collect Your Content
If you're doing a puzzle, design and export the images. I used Photoshop for this. Use whatever you're comfortable with. If you're NOT doing a puzzle, just collect all the images you'd like to use in one folder. This just makes dragging and dropping them into Planoly that much easier.
Starting a puzzle from scratch? Feel free to use THIS Photoshop template for a 3x3 grid and THIS Photoshop template for a 3x5 grid.
 click to enlarge
2. Drag, Drop, and Rearrange in Planoly.
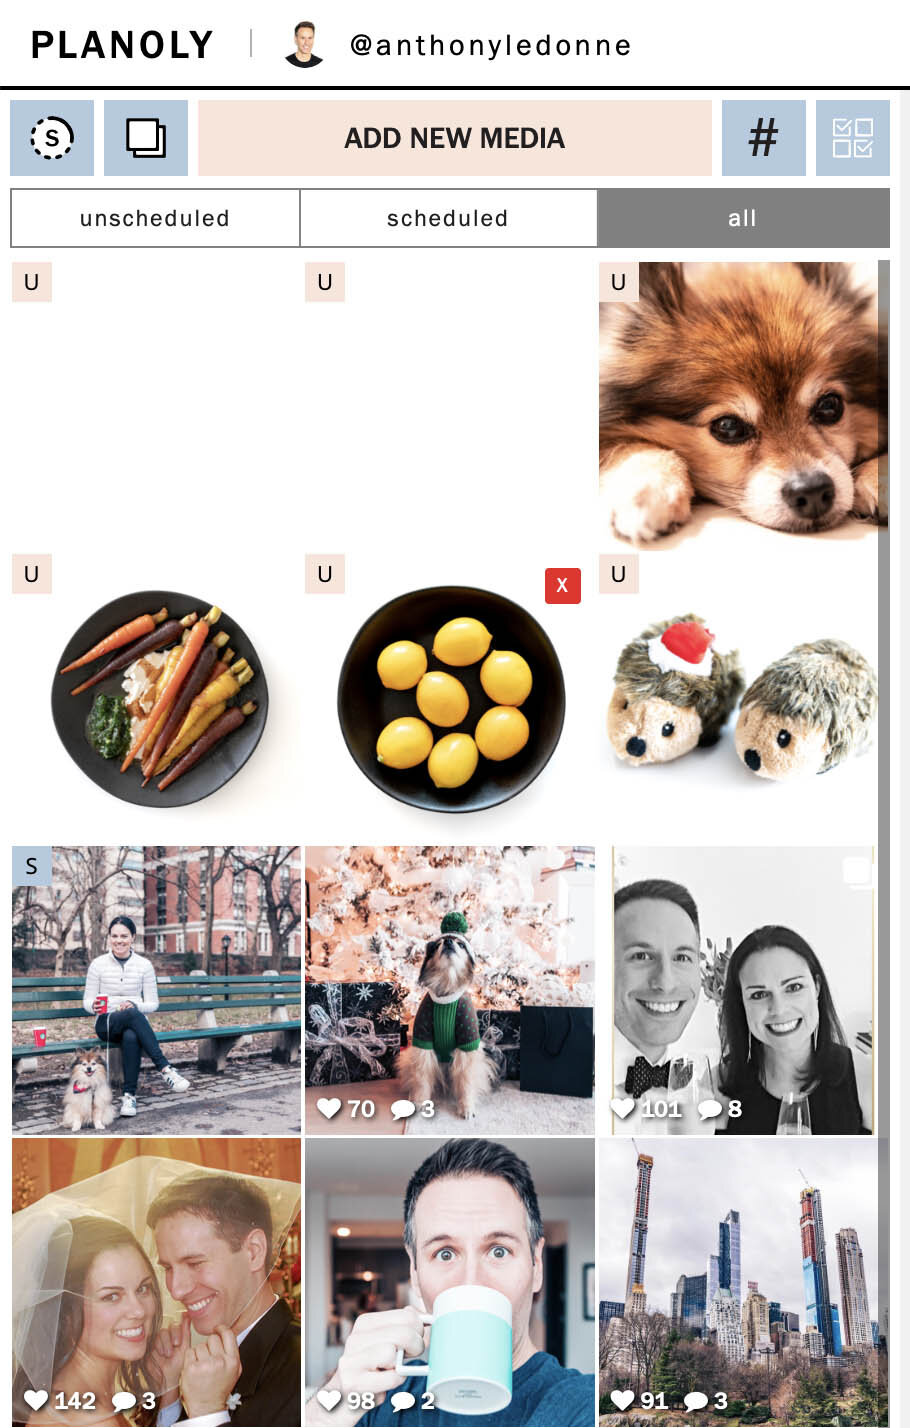
This is the easiest part. Just drag and drop all your images into Planoly. Give them a moment to upload. Once they're finished, rearrange them so they're in the order you want.
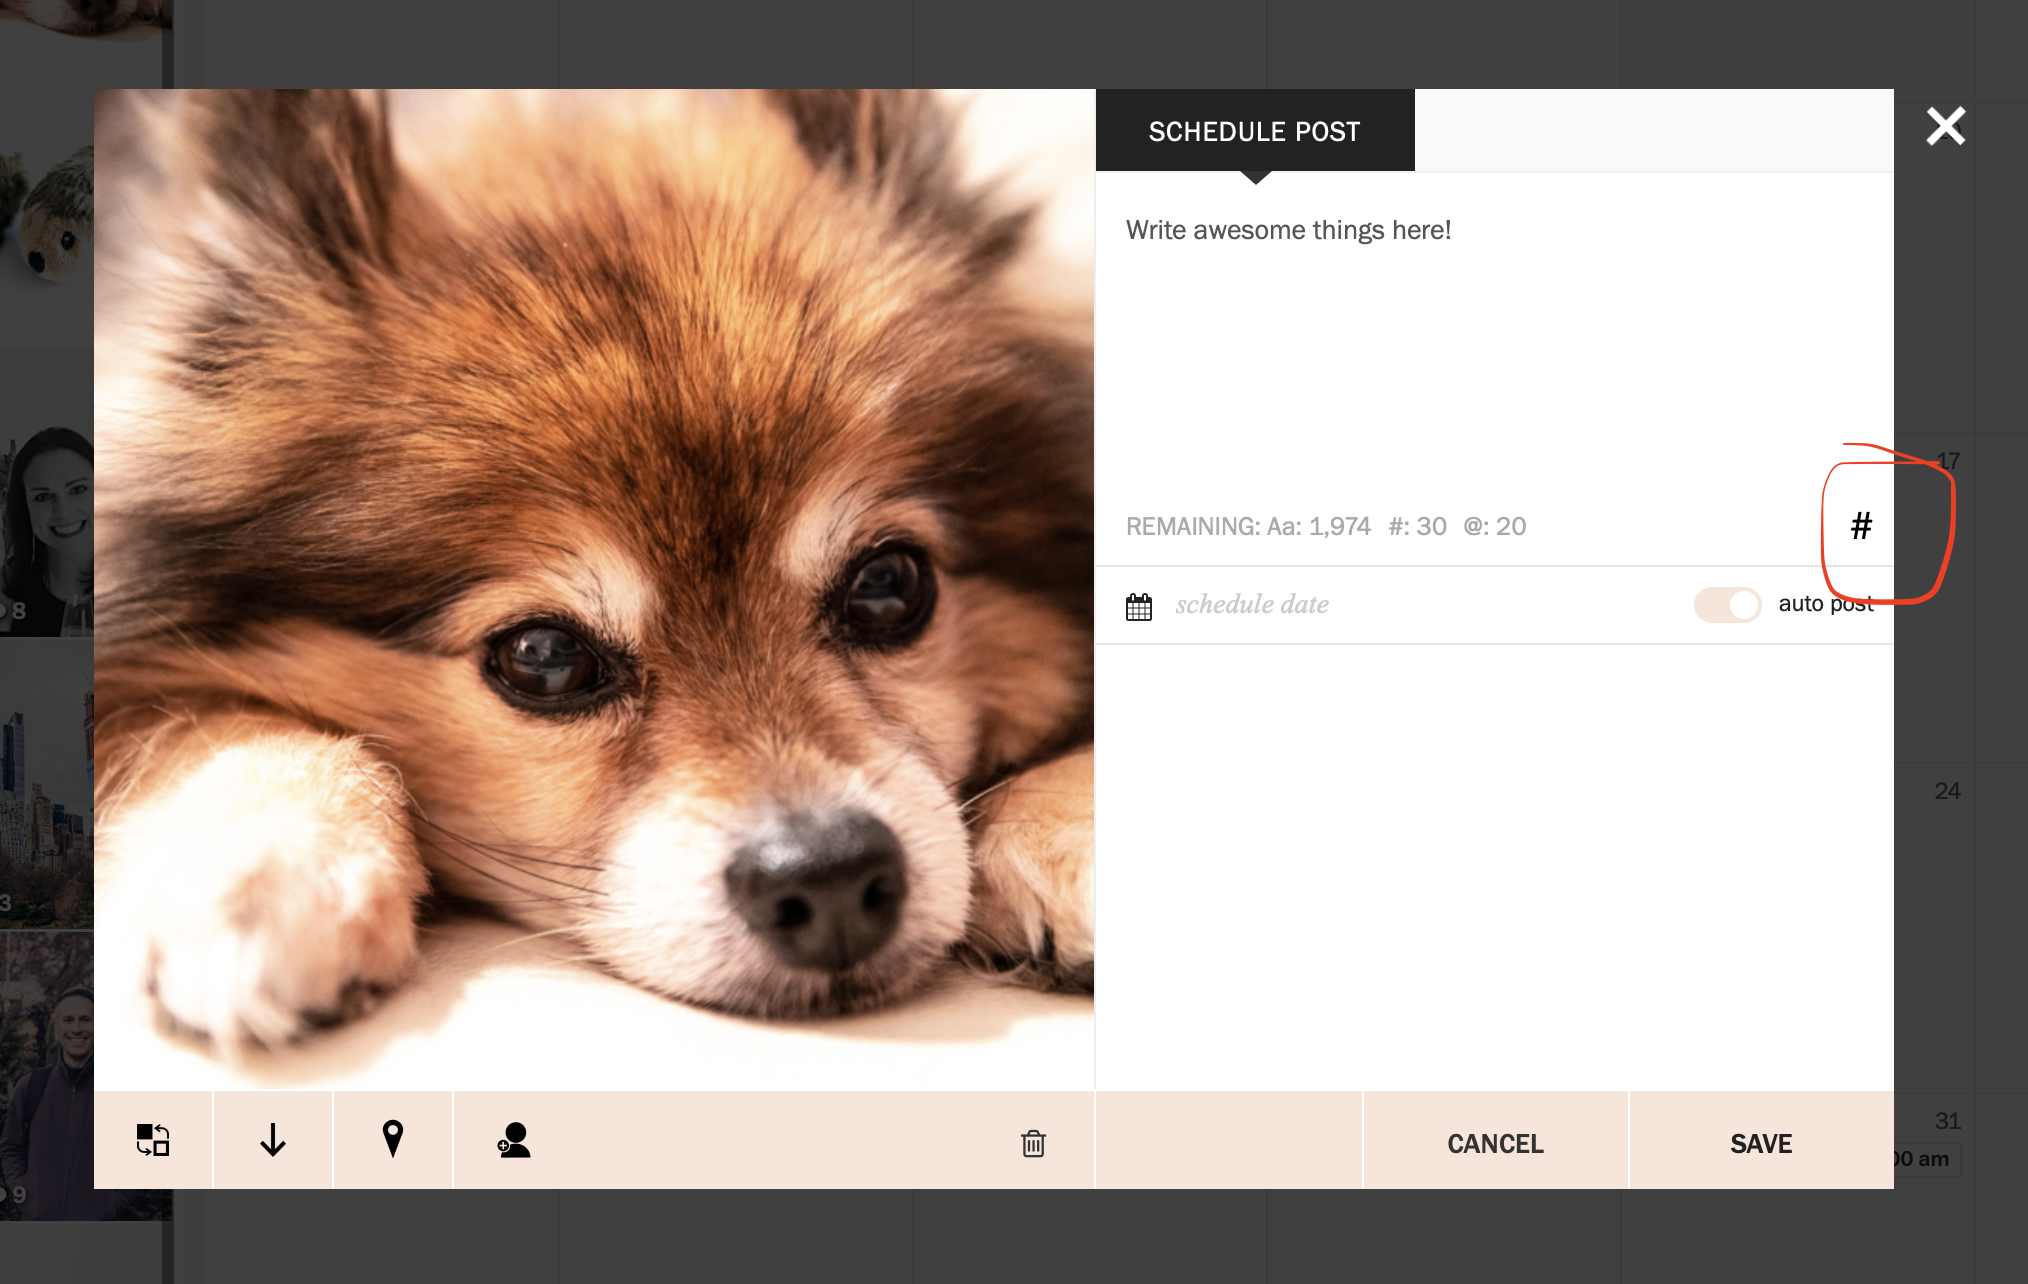
3. Fill out the caption and tag people and brands.
Creating great captions is beyond the scope of this article [and my knowledge]. If you have any pointers, drop them in the comments below!
 click to enlarge
4. Select hashtags.
I was copying and pasting commonly used hashtags from the Notes app on my phone until this. Planoly makes it SUPER easy to reuse hashtags.
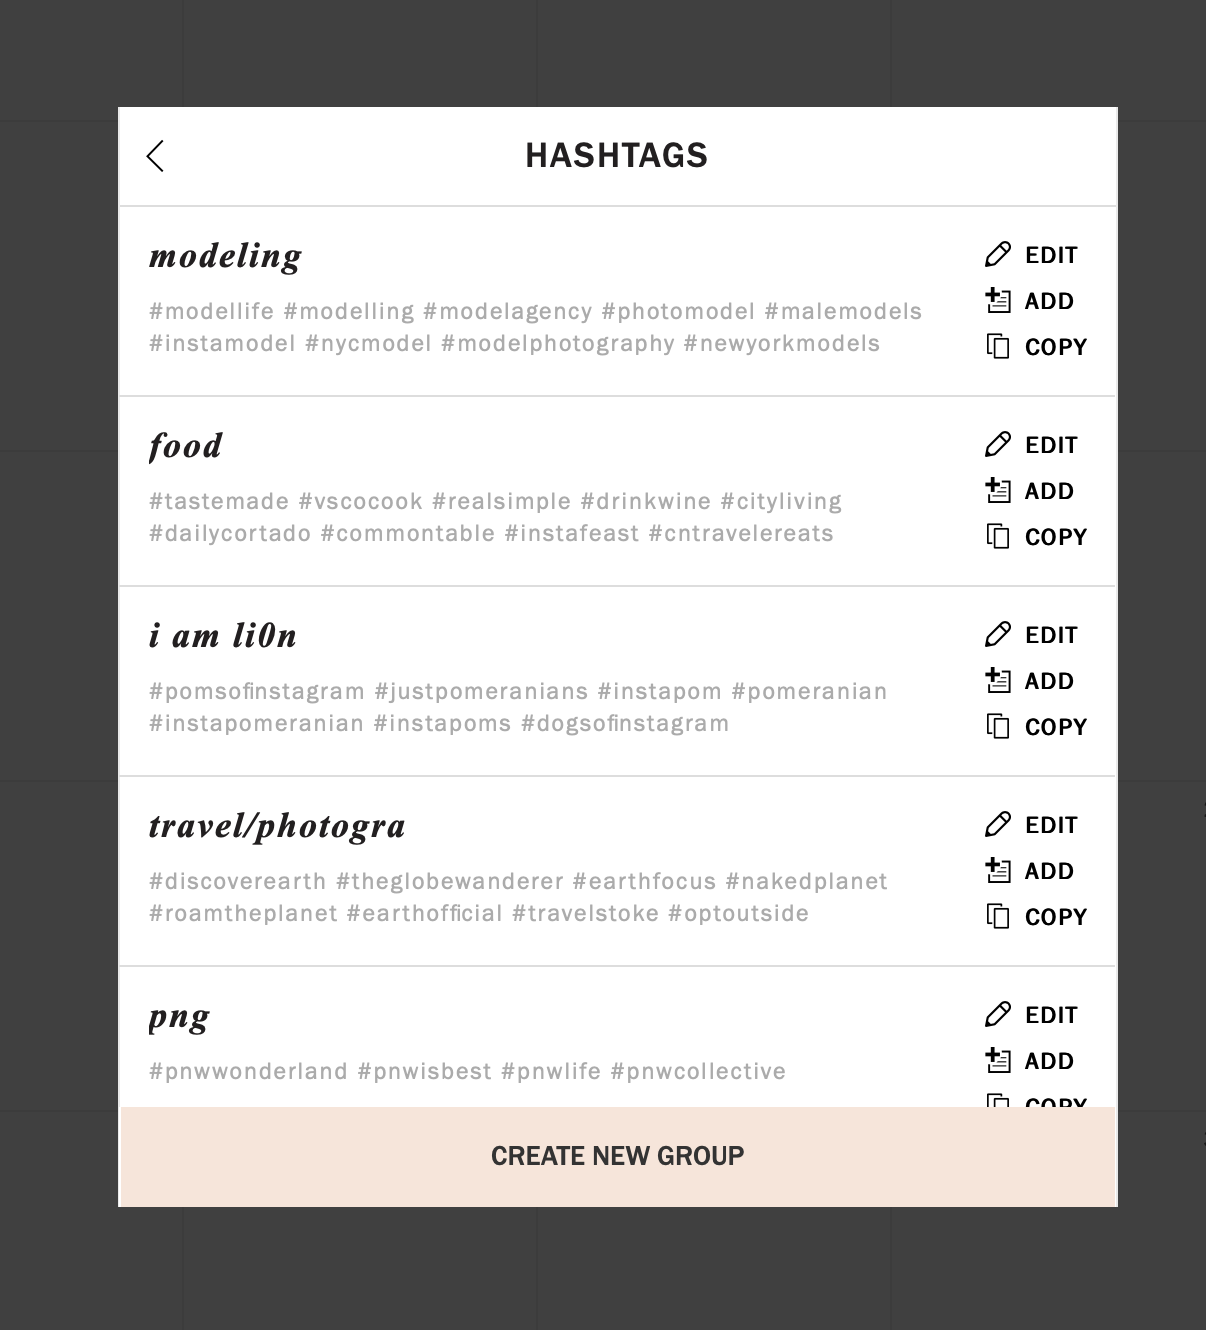
To create a hashtag group:
1. click the pound sign,
2. click the pink “CREATE A NEW GROUP” button,
3. add a name and hashtags,
4. click save.
 click to enlarge
To add that hashtag group, click “ADD” next to the group you want to add. They’ll appear in the caption. I usually add a few returns between my caption and my hashtags.
That’s another nice thing about Planoly, it preserves hard line breaks so everything doesn’t run together—which is the default behavior when you’re pasting stuff directly into Instagram.
5. Schedule
Sweet! Now you’ve got your image, you’ve got your caption. All that’s left is to schedule it. Pick a day and time in the future. I know, it’d be AWESOME to post in the past [I think?], but you’ve gotta schedule it for the future.
That’s how time works.
Click in the schedule date field next to the auto post switch, and select your date and time.
6. kick back, relax, and enjoy the calm
That’s it! Now you’ve got your daily Instagram scheduled for as far out as you want. Doesn’t it feel good knowing that you won’t have to worry about it EVERY SINGLE DAY?
Go pour yourself some Champagne or Scotch—or both!—and celebrate.
Was this helpful?
If so, don’t forget to subscribe below. If you have questions, hit me up in the comments section!