The Blog
Search
How Pinterest Became My Single Largest Traffic Driver
Since the beginning of the year, Pinterest has become the single largest driver of traffic to my website. It’s only been 6 weeks. But Pinterest replaced Direct traffic, Organic Search, Email, and all other referral traffic, combined.
How?
What’s the secret sauce?
I created pins that point to my website.
It’s not enough to create blog posts. You need to tell the world about them. And pinning is one of the best ways to do that.
Here’s my step-by-step tutorial on how to increase traffic with pins.
Step 1: Write a blog post.
That should go without saying but I have no idea who you are. You might be the one shampoo bottles still have instructions for.
Step 2: Create 5 pins PER post.
Sounds cray, right? It’s not. And it’s not too difficult either.
The trick is to create your pin templates. I use canva.com. Their out of the box designs are good and free. You can create one template and use five headlines for each post. Or you could create five templates and use the same headline. Or mix and match. Totally your call. You could even experiment with having text only pins vs pins with images. Check out my Blog Board on Pinterest if you’re looking for inspiration.
Step 3: Schedule the pins on Tailwind.
I use Tailwind to do two things. Scheduling pins is one of them. If you post all your new pins at once, Pinterest won’t show them to many people. But if you space them out during the day, more people will see them.
I drag and drop all my pins into Tailwind, give them the appropriate URL on my blog, copy/paste a keyword rich description so that it shows up in search, and select which board they should be posted to.
Step 4: Schedule Tailwind’s SmartLoops feature
This is incredible. SmartLoops will basically repost your pin to Pinterest for as long as you want it to. So, instead of your pin publishing to Pinterest once, and thus only coming up in the feed once, it’ll come up as often as you have your SmartLoop set to loop.
That’s it!
So You Want To Get Started In Stand-Up...
That's wonderful! I can't wait to buy tickets to your show at the Beacon Theater! I'm sure you'll be there in just a few years.
If I may offer some advice that will help accelerate your career as a stand-up:
- start writing,
- read two books,
- take a comedy class.
That’s it. That’s all you need. This magic combo should get you well on your way to finding your creative voice, landing an agent, and booking your first multi-million dollar endorsement deal. For Juul.
The single most important step is to start writing. Right now. Don’t even finish this [amazing, life changing] blog post. But if you already pushed through and didn’t heed my advice then just continue reading. I don’t want to stop you on your meteoric rise to international stardom. Just promise me that as soon as we’re done here you’ll start writing, okay?
The books will give you a solid writing foundation. You'll learn joke structure. You'll learn how to write and edit material. And you'll gain a few tips on how to perform.
But then get back to the writing. It’s really the most important part of this whole thing.
The third thing, the class, will help. It’ll shortcut the process of putting together your first five minute set; it'll get you on stage faster, and you'll learn how to get on stage in the first place—which isn't always easy to figure out.
My recommendations?
Book 1: Stephen Rosenfield's Mastering Stand-Up: The Complete Guide to Becoming a Successful Comedian
Book 2: Judy Carter's The Comedy Bible: From Stand-up to Sitcom--The Comedy Writer's Ultimate "How To" Guide
Class: Manhattan Comedy School. I took a few of their classes and loved them. I also built their website!
3 Places To Eat & Drink Your Way Though Central Park
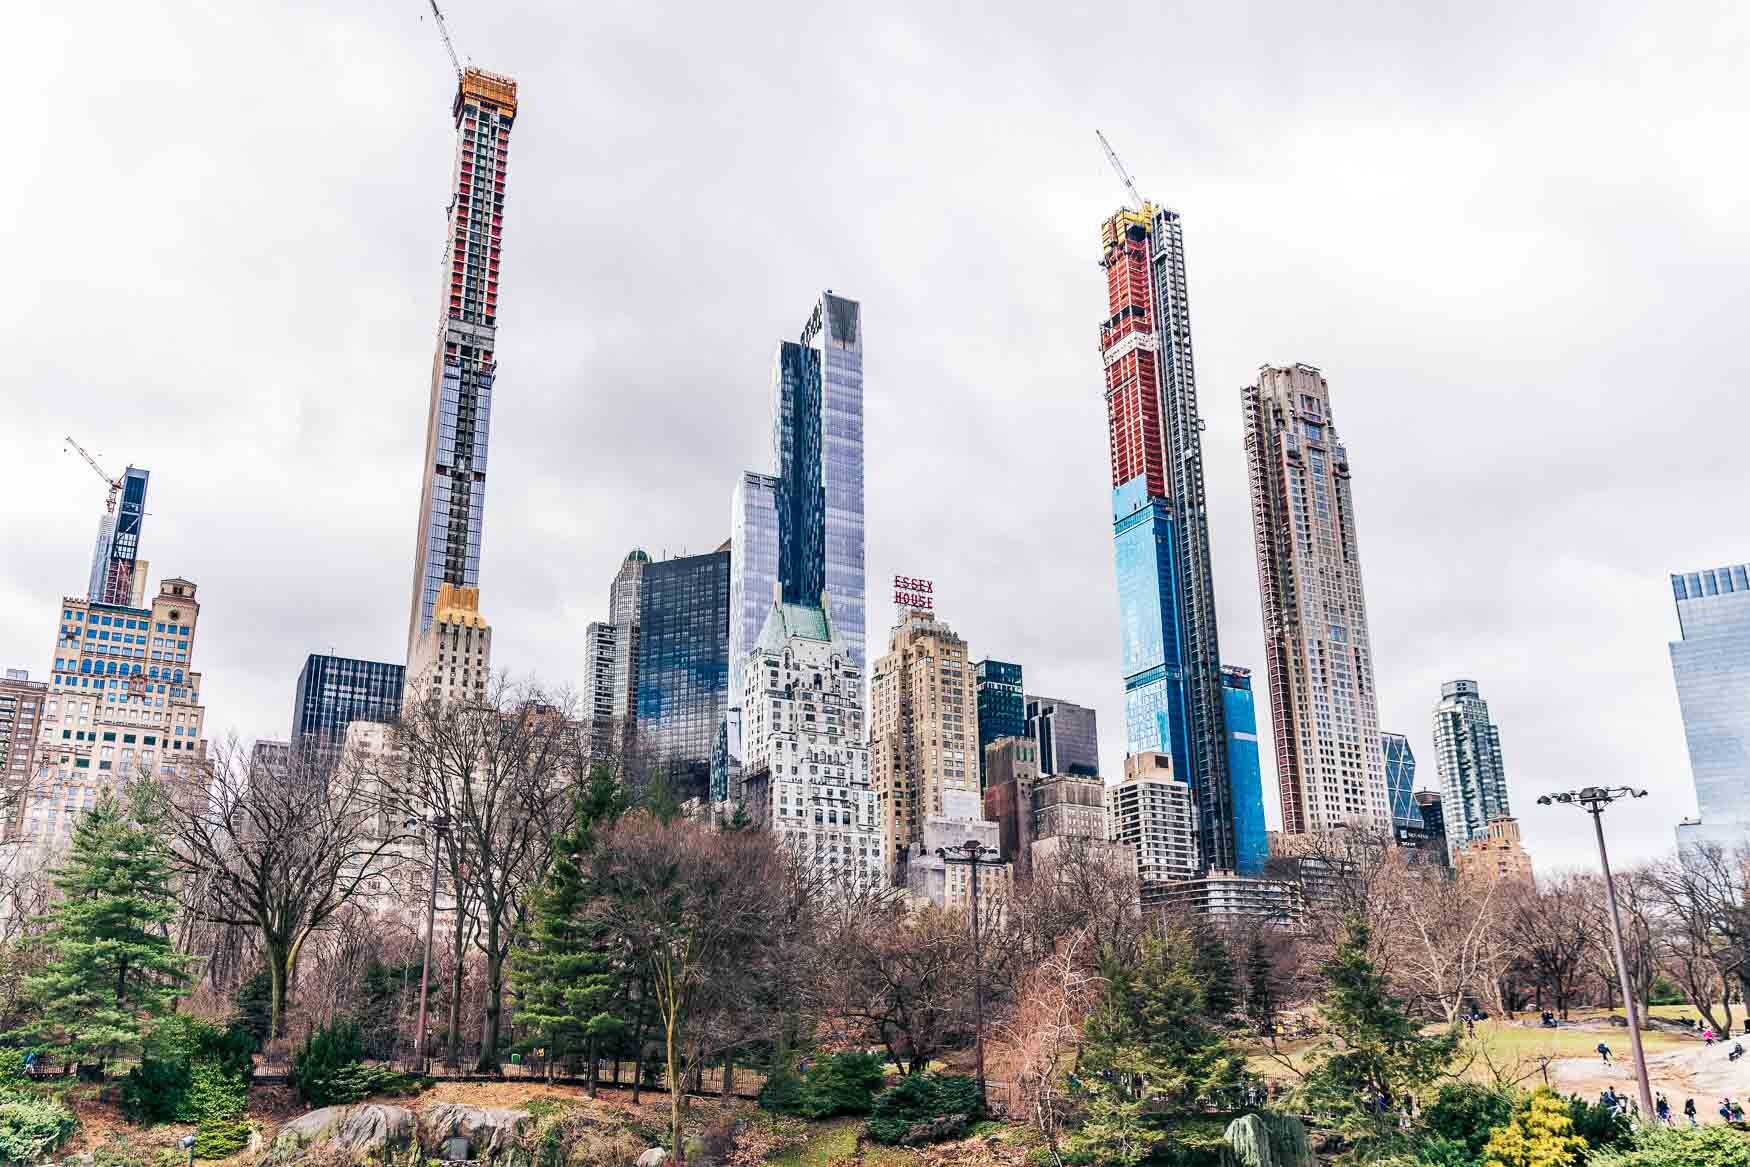
Maybe someone’s dragging you to Central Park. Maybe you’re visiting New York. Whatever the reason, you’re going to need food, water, and—especially if you have kids—alcohol. Here’s my go to recommendations for spending a day in and around Central Park.
-
Cafe Luxembourg. Stop here for an early lunch before going to the park. Get the tuna tartare and the beef tartare. But get the big beef tartare; it comes with fries. Whatever you do, do NOT leave Lux without having an order of fries. They alone are worth a trip to NYC. While you're there, say hello to Ryan the bartender. Or Rachel the bartender. Or Israel the bartender, or… Okay fine, just say hello to any of the bartenders and show them my picture. They might top off your drink, or they might throw you out. It's also a favorite among celebrities. Rumor has it it's one of Tom Hanks' favorite NYC restaurants. Wiff and I have seen Kathleen Turner there a few times and Al Pacino once.
Location: 70th & Amsterdam, 200 W 70th St, New York, NY, 10023
Website: cafeluxembourg.com
Phone: (212) 873-7411 - Tavern on the Green. Stop here for a drink and a snack while you’re at the park. Unless it's 20˚F out, the main patio is always full. Try to get in if you can. You may have luck sitting at the high top bar. If you can't get in, grab a drink at the little window to the left of the check in stand and sit in the seat-yourself area. Even at peak times there's usually a table open. They have a decent selection of wine—two Pinot Grigios and a rosé—and a small selection of beer. Oh! And they're dog-friendly!
Location: 67th & Central Park West, Central Park, W 67th St, New York, NY 10023
Website: tavernonthegreen.com
Phone: (212) 877-8684 - Bar Boulud. Stop here after the park for a pre-dinner drink. Or drinks and dinner. It’s worth it. This was one of the first places Wiff and I went for a bite to eat and some drinks when we moved to NYC. I still remember it like it was 8 years ago. Ah... We had a glass of wine, the charcuterie board, a few more glasses of wine, maybe something else, I don't know. Did I mention we had wine? Sit outside in the warmer months. If you dress warmly enough you can sit outside during the cooler months too—do so, and you'll be rewarded with wide open availability.
Location: 64th & B’way, 1900 Broadway, New York, NY 10023
Website: barboulud.com
Phone: (212) 595-0303
My Favorite Photography Websites
500px
It’s like Instagram without the selfies. I use this site to plan photo shoots. For instance, at the time of this writing, I’m planning a trip upstate as a writer’s retreat. But I also want to shoot photos. I go to 500px.com, search for images of “Hudson Valley,” which might lead me to “Olana” or “Rhinebeck”—all Hudson Valley terms—and I see where other people have taken pictures. Then I can head to my second recommendation…
Google Maps
I use Google Maps to get the lay of the land. Since this photo shoot is secondary to the writer’s retreat, I want to make sure potential shoot locations are nearby. I don’t want to drive 2 hours upstate only to drive another hour to get to a shoot location. I also use Google Maps to find interesting nature things, like ponds, rivers, islands, mountains, forests, etc. Those tend to be more interesting than a road. Switching to satellite view helps me figure out whether I’ll have line of sight to an interesting building over a pond, for instance.
Nations Photo Lab
NPL is my goto printer for photography. I like their user interface and their pricing. They also ship SUPER fast. I’ve sent stuff to them in the evening and had it ship the next morning. I’ve printed dozens of photos and they’ve never screwed up. Also Google “Nations Photo Lab Promotional Code” to see if they have any coupons. I often save at least 20-30%.
FStoppers and Petapixel
I check out FStoppers and Petapixel whenever I’m procrastinating. They have interesting photography news and tutorials. I just wasted 20 minutes clicking through their archives while I was writing this little list. Well done, me.
B&H
B&H is where I buy 99% of my photo and video equipment. If you want to buy a photographer [like me] a gift and you’re not sure what to get, a gift card to B&H is always a good idea.
New Material Monday: Shelf Space
This joke’s first time on stage. What do you think?
This is brand new material. Never before seen. Never before heard. It’s the first time it’s hit the stage. It’s rough and needs work, but I think there’s potential. What do you think?
Drop me a line in the comments below!
How to Edit Your First Photo In Adobe Lightroom Classic CC
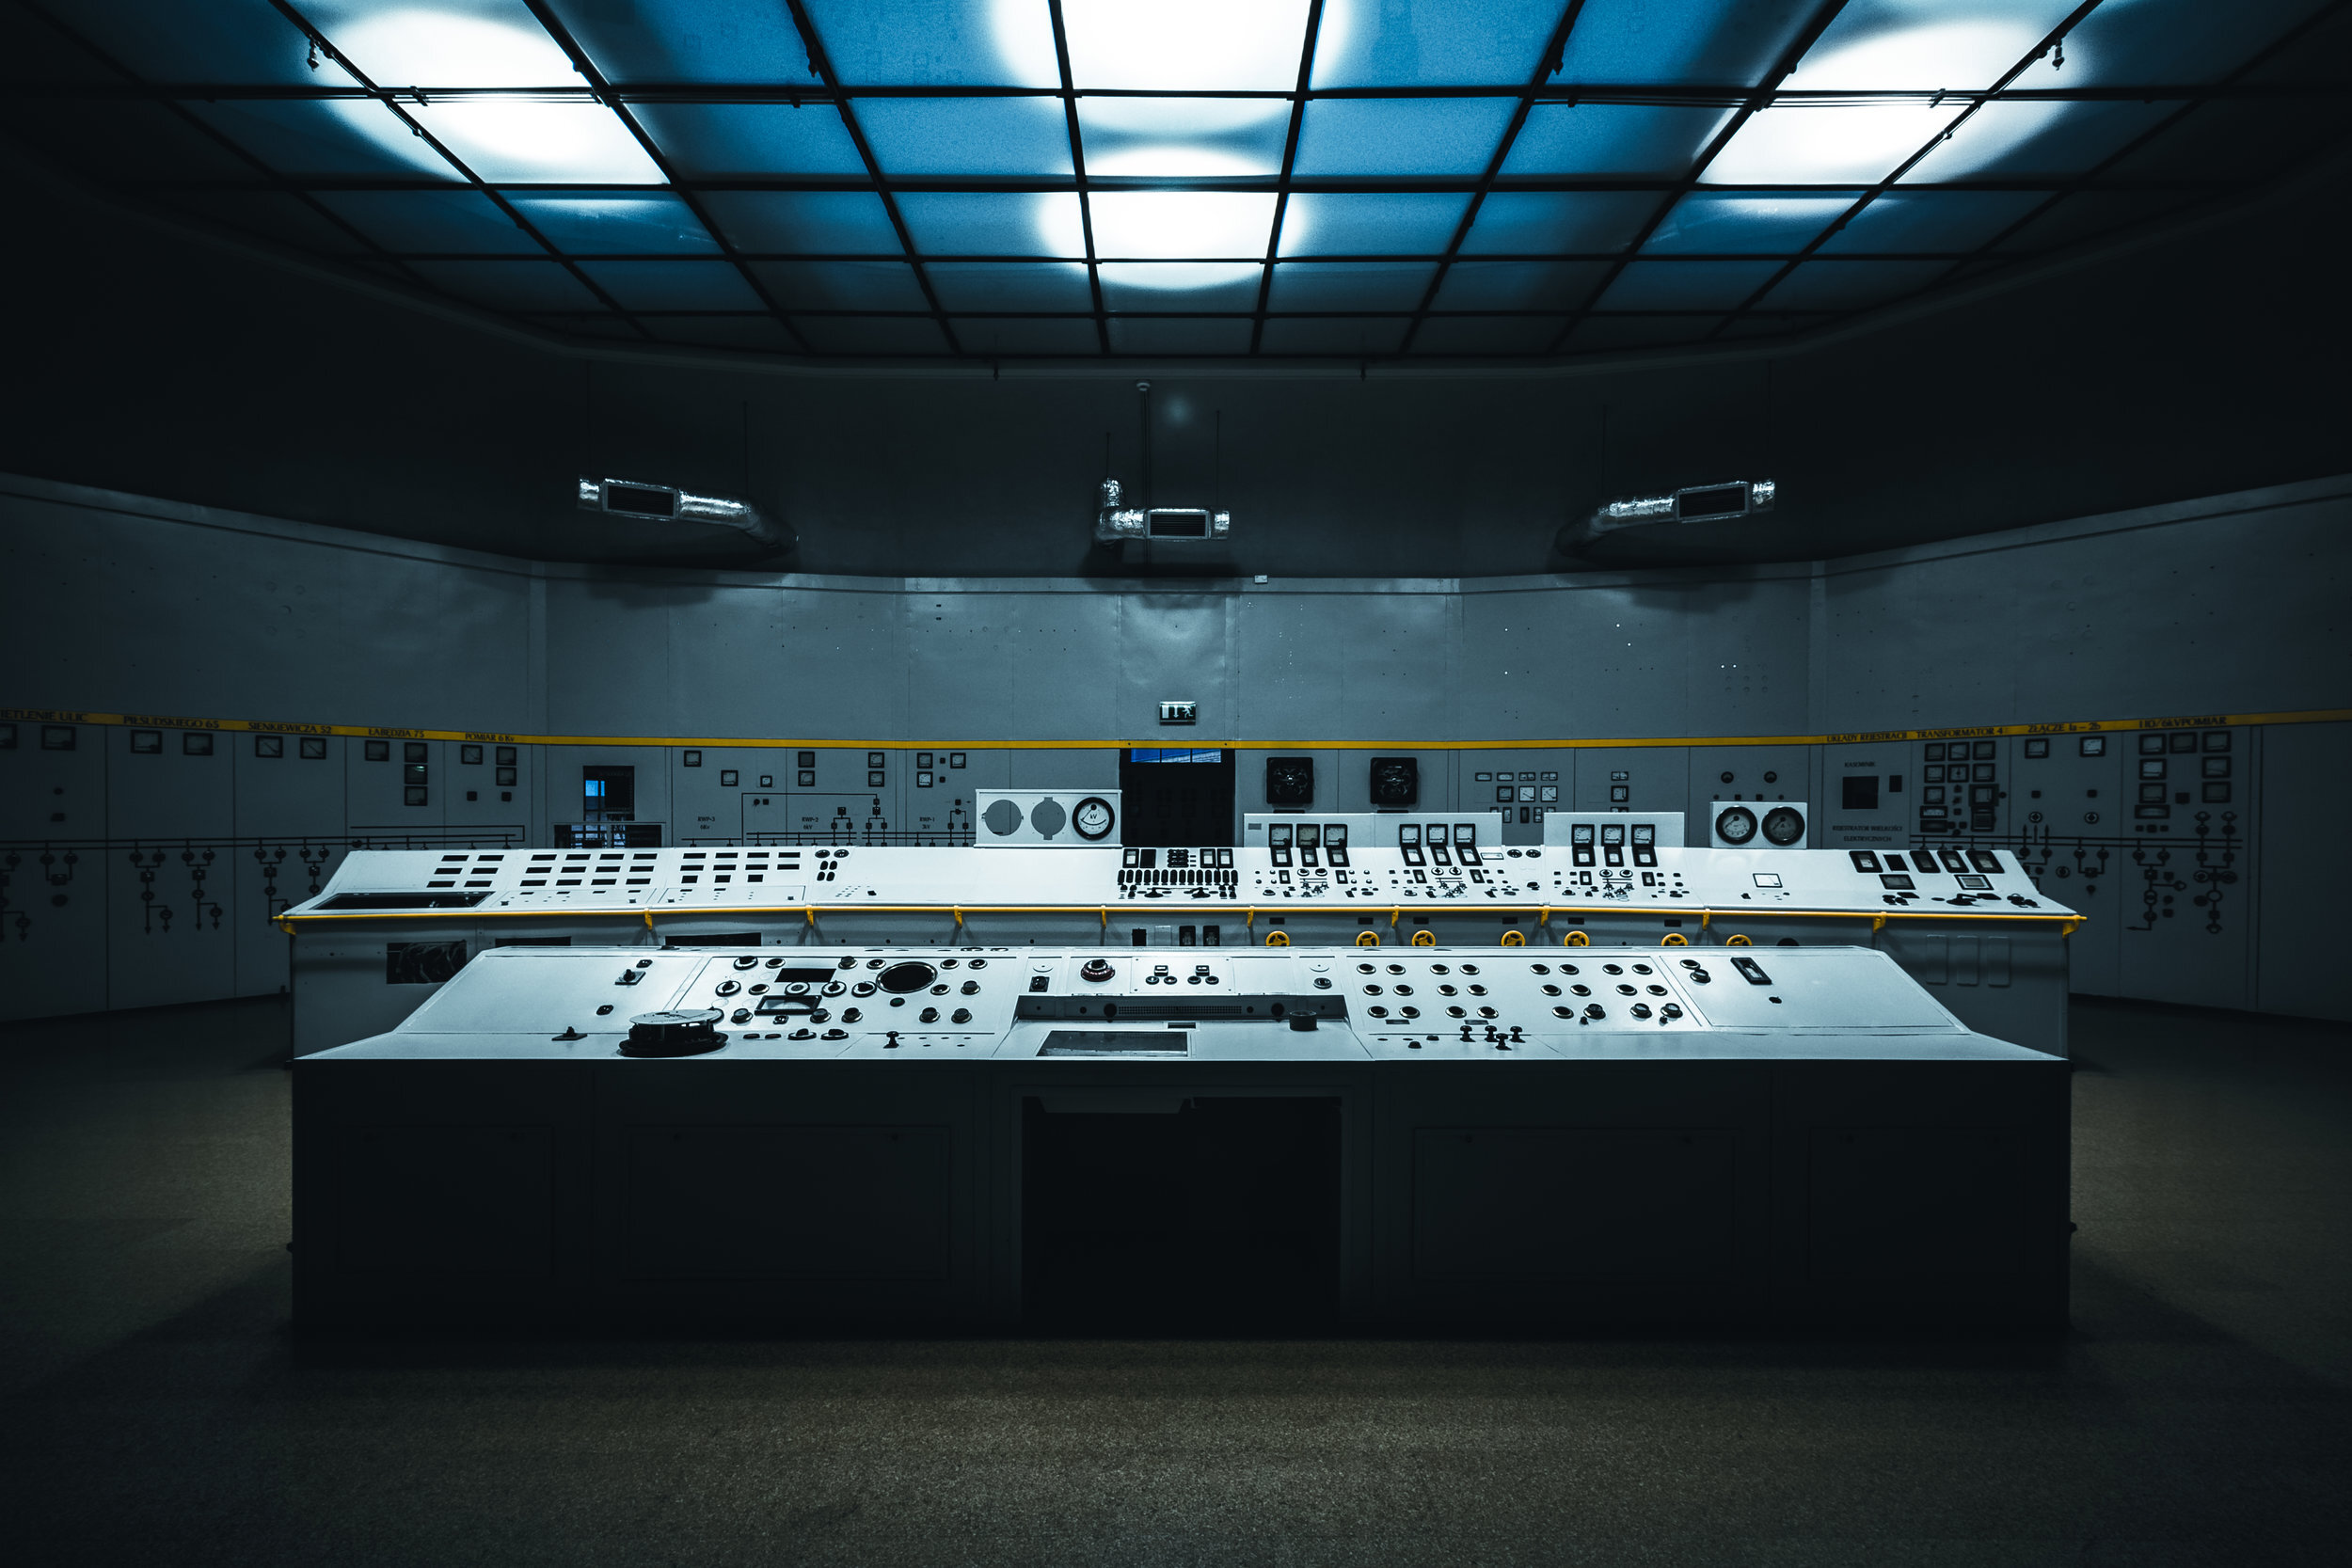
Hey folks! Today’s quick blog post is going to be a SUPER quick primer on Adobe Lightroom.
It is for complete beginners—people who just bought their first DSLR or Mirrorless camera, took a few pictures, and are scratching their heads wondering, “How come my pictures don’t look as good?”
I’m going to do this little how-to in the form of a workflow. I’ll show you the exact steps to take so that you can get up and running in Lightroom in 10 minutes flat.
Open Lightroom
On my Mac, I open Spotlight (hit ⌘+Spacebar), type Lightroom, and hit enter. It opens right up.
Import Photos
Shortcut time! Hit Shift+⌘+I (an I as in import) to open the Import Photos and Video window.
On the left side, you have the Source column. This is where you’ll tell LR where to find the photos you want to import. Look for your SD/CF/Whatever card and click it. LR will bring up thumbnails of all your images in the center column. By default, everything will be selected for import. This is good. It means we don’t have to do anything. Before moving on, I’d recommend selecting Copy in the top center of the window. You don’t need to worry about converting to DNG. Copy is just fine.
- On the right side is where things get fun.
- First, the File Handling box. This is where you’ll tell LR what to do with the files. Here are my settings:
- Build Previews: Minimal
- Build Smart Previews: [Checked]
- Don’t Import Suspected Duplicates: [Checked]
- Make a Second Copy To: [Unchecked]
- Add to Collection: [Unchecked]
- Next, the File Renaming box. This is where you’ll tell LR how to rename your files. I totally recommend doing this so you can better keep track of your pictures. Here are my settings:
- Rename Files: [Checked]
- Template: Custom Settings. To change this, select Edit from the dropdown. I like this format: 20190107-Shoot Name-Sequence # (0001). I like it because I know the date of import, the name of the shoot, and then the number of the shoot within the sequence. For example, here’s what a typical filename looks like: 20190107-Boston Acorn Street-0001.ARW. Don’t worry about the ARW for now. That’s just the extension of Sony’s RAW files.
- Shoot Name: Type in a name for the shoot. I stick to location or event. When I was shooting my cookbook, the Shoot Name was the name of the recipe.
- Start Number: 1
- Extensions: Leave-as-is
- Rename Files: [Checked]
- Apply During Import. This is where you’ll tell LR what to do with the pictures as you’re importing them. Here are my settings.
- Develop Settings: I have a preset to add manual lens correction, and I use it here. You don’t have to do anything.
- Metadata: Copyright. You can leave this to None if you prefer.
- Keywords: I find that keywords help with organization. I include the name of the city and state where I shot the image, and whether it was “street” or “food” or whatever. You can use whatever system you like.
- Destination. This is where you’ll tell LR where to store your files.
- Into Subfolder: [Checked]. I always name this folder as well. If I have four different shoots in Boston, for instance, I’ll dump them all into a “Boston” folder, and maybe into a subfolder. Use whatever system you like here… You could have a Travel folder, and then create subfolders for every state, or region, or country, or whatever you travel to.
- Organize: Into One Folder
- Folder: Select the parent folder you want to dump these pictures into!
- First, the File Handling box. This is where you’ll tell LR what to do with the files. Here are my settings:
- Then hit the IMPORT button in the bottom right and watch as everything gets imported!
Editing Photos
Okay, you just imported your first photos into LR. Congratulations! Next, you’ll need to edit them.
Once the Import Photos and Video window closes, you’ll be left with your library. To get you acquainted:
The top strip shows you what module you’re in. Module is just a fancy word for what MODE you’re in. If you click Library, you’ll see your library. If you click Develop, you can start editing a photo. We’ll only ever use the Library and Develop modules. At least I’ve never used the other modules and haven’t found a need to yet.
The left column is how we’ll navigate around…
You know what, let’s not worry about getting acquainted. Let’s focus on editing a picture. Okay?
Make sure you’re in the Library module by clicking Library at the top. (Or hit the L key.)
Click once on a photo to select it.
Ready for another shortcut? Hit the d key. This will switch over to the Develop module.
Don’t get overwhelmed. I know there’s a bunch of stuff. Don’t look at it. Just look at the photo and the right column.
Ready for a sweet shortcut? See the word Basic towards the top of the right column? See the word Auto below it? Hit that.
Cool, right? I mean, it’s not the most amazing thing in the whole world, but I’m always amazed at how great of a start it gives me for editing.
Exporting Photos
Why are we even taking pictures if we can’t ‘gram them! Here, I’ll show you how to export pictures so you can post them to Instagram. Or schedule them on Planoly.
- You can do this from the Library module or the Develop module. If you’re in the Library module, select the image (or multiple images) you want to export. If you’re in the Develop module, skip to step 2.
- Hit Shift+⌘+E to open the Export Files window. Here are the settings I use:
- Export To (at the top of the window): Hard Drive
- Export Location
- Export To: Choose folder later
- Put in Subfolder: [unchecked]
- Add to This Catalog: [unchecked]
- Existing Files: Choose a new name for the exported file
- File Naming
- Rename To: [unchecked]
- File Settings
- Image Format: JPEG
- Color Space: sRGB
- Quality: 100%
- Limit File Size: [unchecked]
- Image Resizing
- Resize to Fit: [unchecked]
- Output Sharpening
- Sharpen For: [checked], Screen
- Amount: Standard
- Metadata
- Include: All Metadata
- Remove Person Info: [checked]
- Remove Location Info: [checked]
- Write Keywords as Lightroom Hierarchy: [unchecked]
- Watermarking
- Watermark: [unchecked]
- Post-Processing
- After Export: Do Nothing
- Hit the Export button and then select the folder where you want the file to go.
- And then upload to Planoly or Instagram!
New Material Monday: The Seattle Freeze
This joke’s first time on stage. What do you think?
This is brand new material. Never before seen. Never before heard. It’s the first time it’s hit the stage. It’s rough and needs work, but I think there’s potential. What do you think?
Drop me a line in the comments below!
My Lightroom Preset for January's Instagram Posts
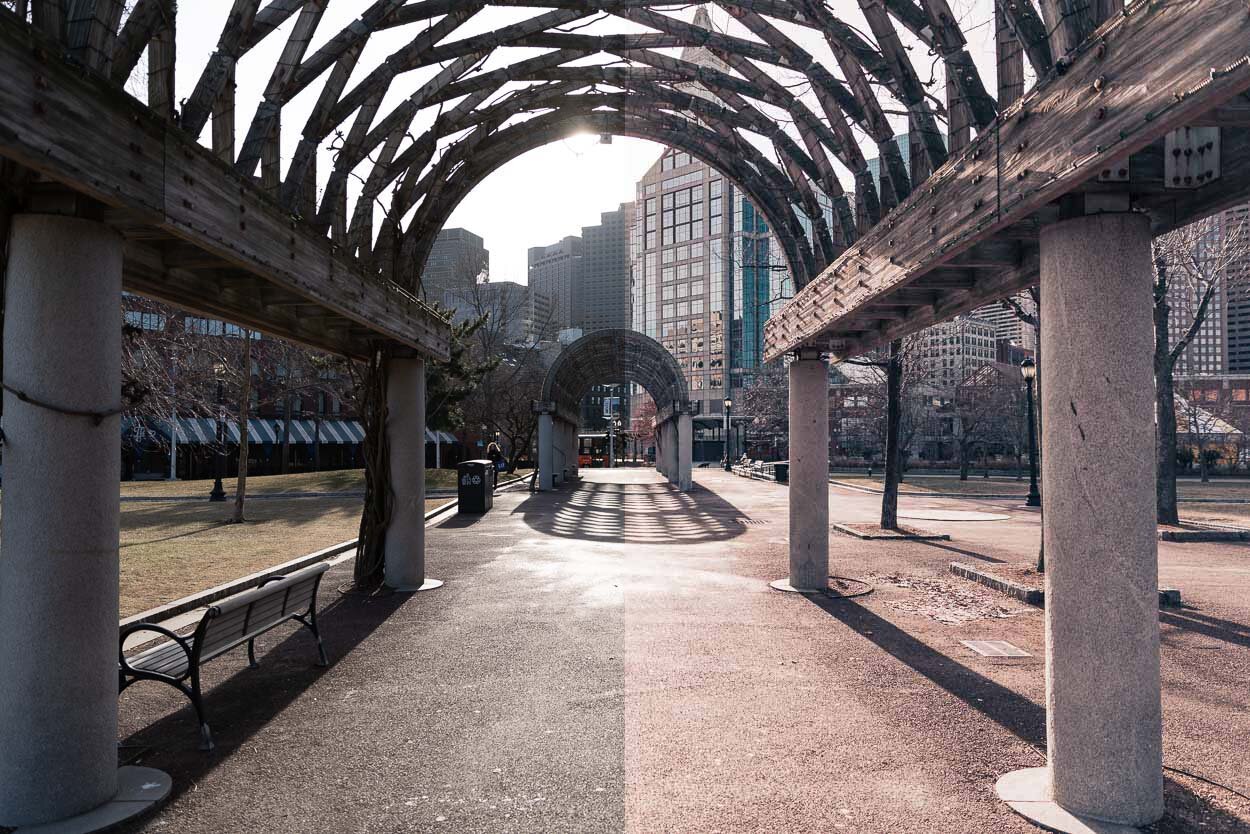 Before (L) and After (R)
I created a Lightroom Preset for all my posts going up on Instagram in January.
Why, you [didn’t] ask?
Because I want my grid to have a cohesive feel to it so that people will follow me. Having 100K Instagram followers is one of my 2019 goals. At the time of this writing I have just over 1000. Almost there! :|
But experts tell us that having a consistent/cohesive Instagram grid is better, more aesthetically pleasing, and more likely to attract followers.
Plus, I just like the way things look when they all go together.
So I made a Lightroom Preset.
And I’m giving it to you.
For free.
Follow me on Instagram here.
Note: In the After image (the one on the right), I bumped the exposure up a third of a stop. So if you apply the filter and get all made at me because it doesn’t look EXACTLY like the one here, that could be why.
If none of this makes any sense because you’re a Lightroom newbie, that’s okay, I’ve got you covered!
Or it could be because you took a better photo [Ansel Adams, is that you?], in which case, why are you even here? You should be on a yacht celebrating all the money you’ve made selling award winning photos.
If you liked this, you may like my other presets.
Questions? Comments? Drop them in the comments section below!
Write Every Day

A few years ago when I first wanted to do stand-up, I googled "how to get started in stand-up" [like all the greats did].
I came across a piece of advice from Louis C.K. that I thought was pretty good. Here it is from laughspin.com: "Go on stage as often as possible. Any stage anywhere. Don’t listen to anyone about anything. Just keep getting up there and try to be funny, honest and original."
I thought it was good advice. I mean, Louis C.K. is was pretty successful.
But now I think it's wrong.
Which is a scary thing to say when so many other people buy into that piece of advice.
So many I'll say this: It's wrong for me.
If I had one hour to get better at comedy, I would spend it writing better material.
It's easy to grind it out at open mic after open mic and not get any better. I've seen some people [me] do the same 5 minute set for months, not advancing one bit [also me].
If you're trying to get stronger in the gym, you add more weight.
You change things. And that's what writing new material does for a comic.
A few weeks ago, I had a spot at Gotham Comedy Club [my fave club in NYC]. A few days prior, I decided that I'd perform two new minutes. In a 6 minute set, 2 would be brand new. Risky, but it's the only way I was going to get better.
I wrote some material about Iceland. I thought it was okay, but I didn't think it would do well.
I was wrong.
It went FAR better than I could have imagined. [Someone actually laughed.] Whether I keep that material is another question—I'm constantly adding new stuff and cutting poor performing stuff—but the lesson to me was this: write as often and as much as you can, and trust that some of it will work.
But the point is, now I've got 2 new minutes to play with. I have something to revise. Something to improve upon. Sure, the delivery might change in subsequent performances, but at I'm 2 minutes ahead of where I was before.
So.
My advice today, mostly to myself, but also to anyone who's listening, is to write more. Write every day. Spend as much time as you can afford writing. Write new stuff. Improve old stuff. Don't just get up day after day and bang out the same exact material.
This is My Favorite Cocktail Bar in NYC
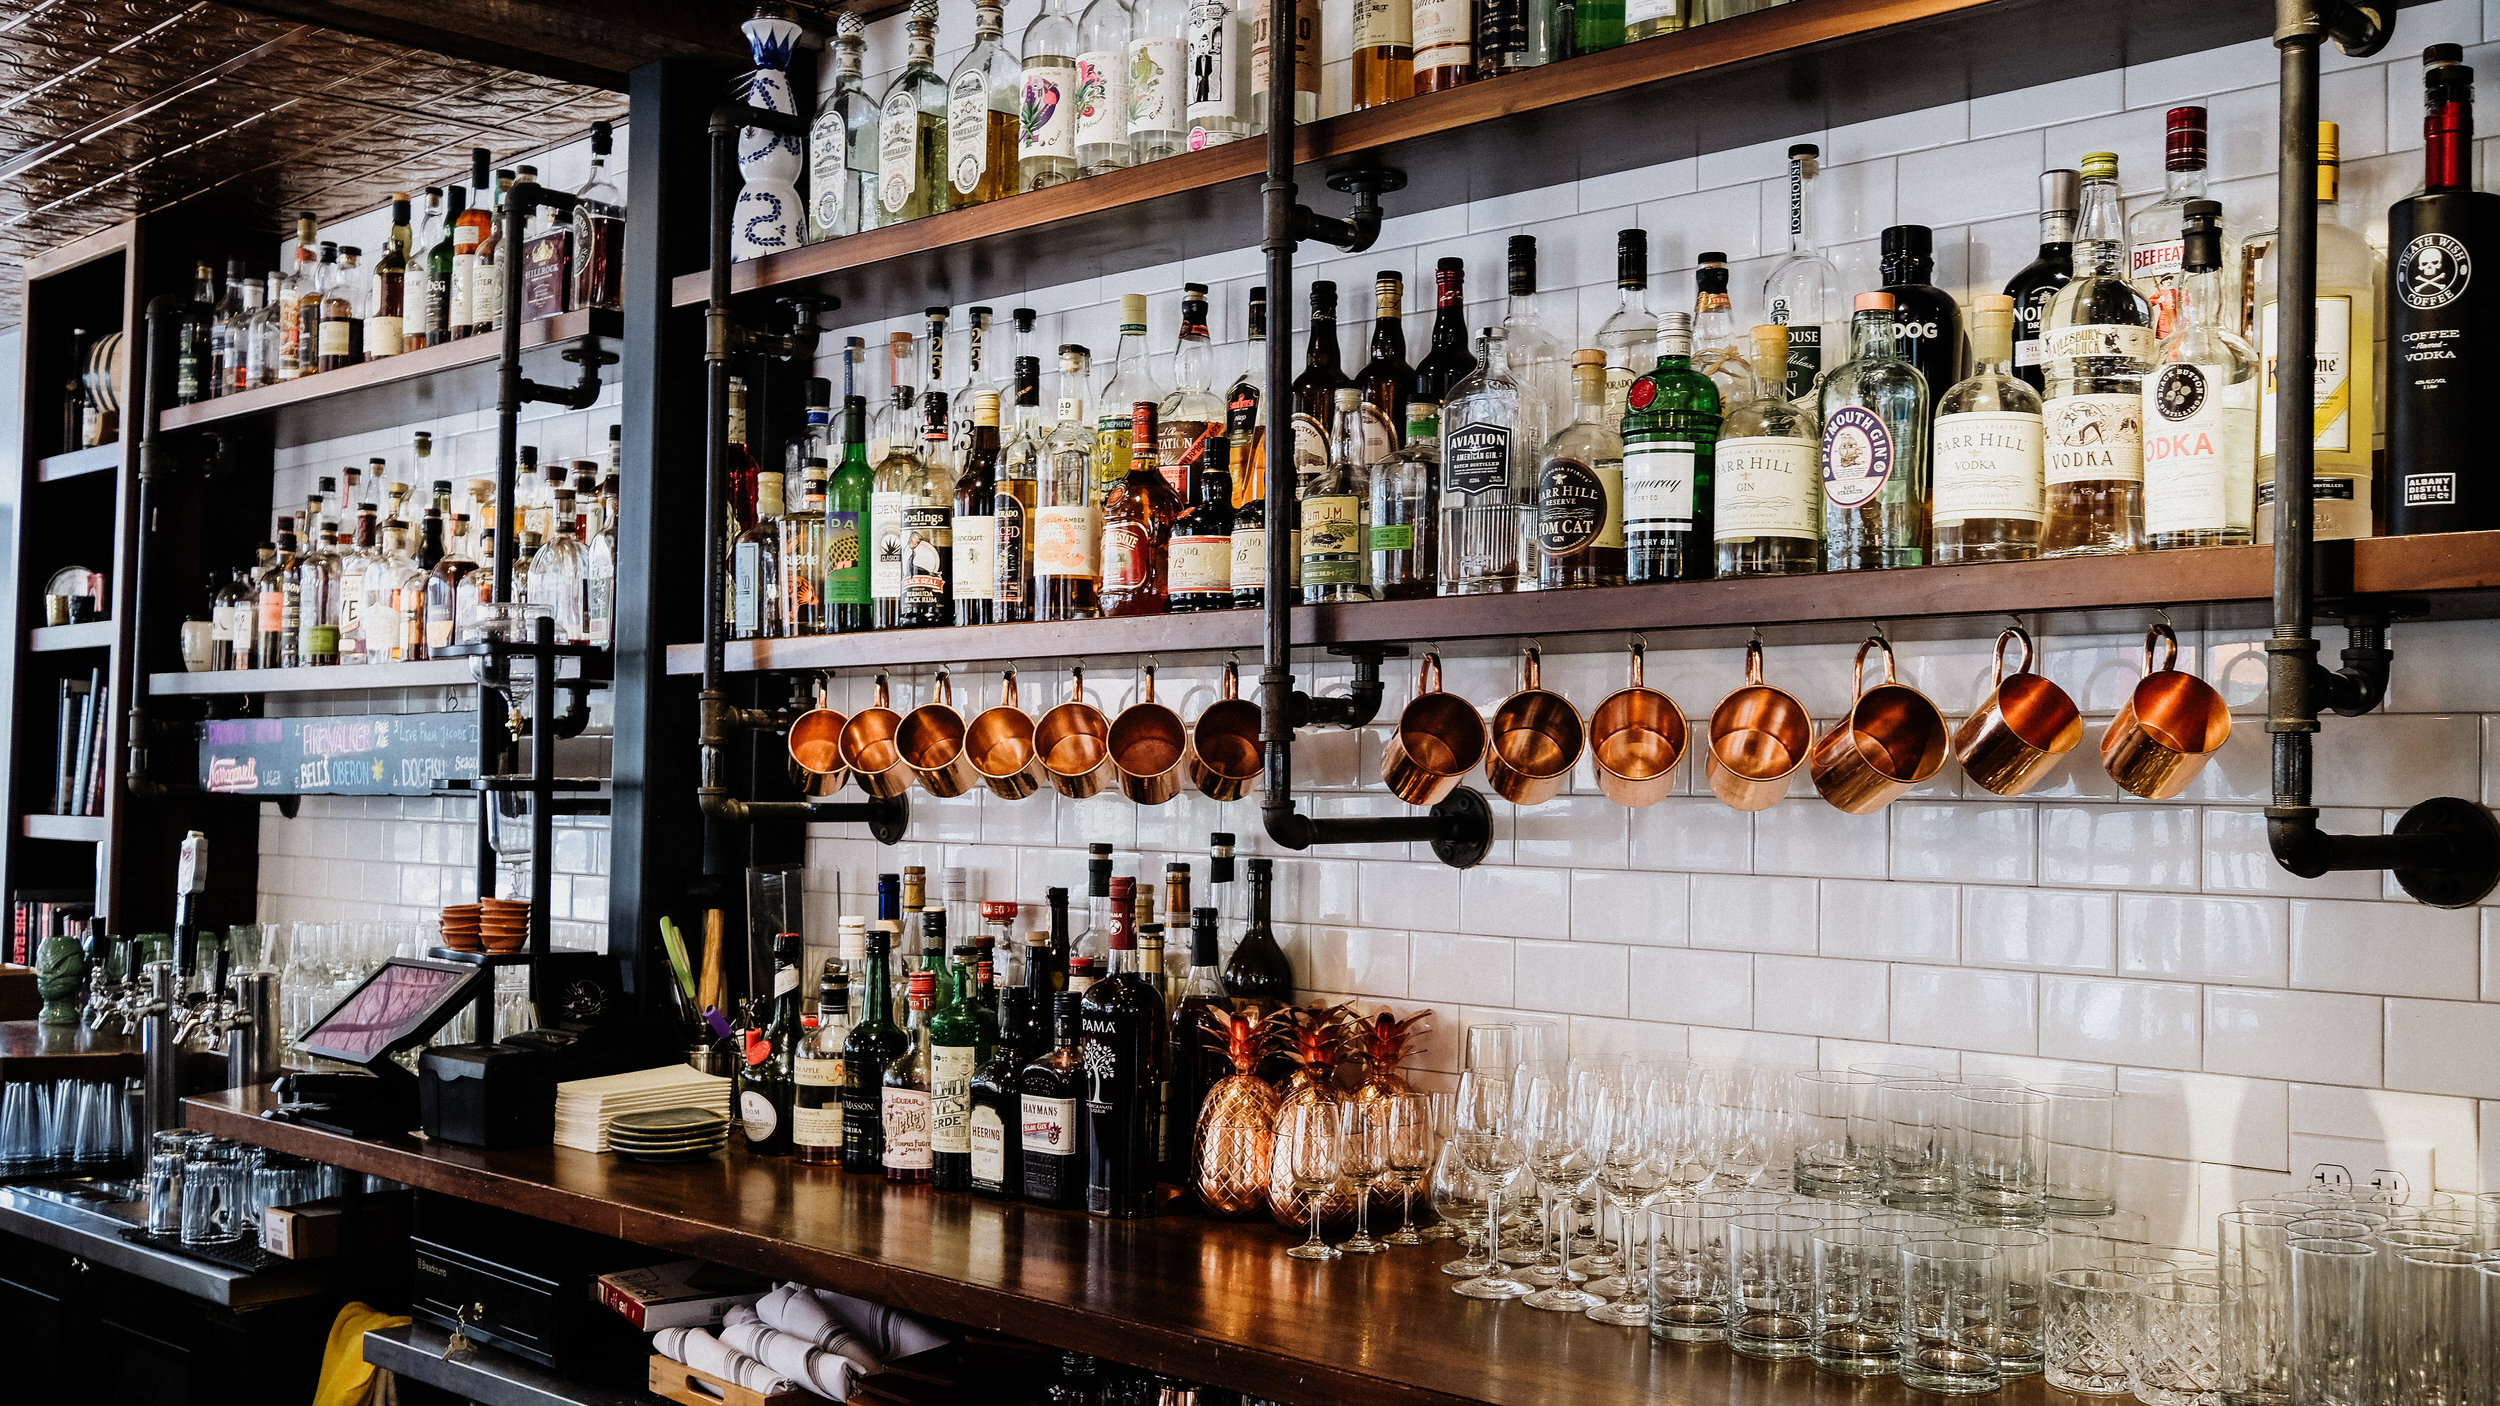 This is not Bar Centrale. This is just a stock image…
Bar Centrale
Bar Centrale [sehn-TRAH-lee] is my favorite cocktail bar in New York. You won't find crazy weird cocktails with ingredients you've never heard of. Their cocktail menu lists their Standards: Martini, Manhattan, Sidecar, etc.
Location
It's located on Restaurant Row, in the Theater District, just blocks away from Times Square. Which is essentially Hell. But even Hell has a hidden watering hole, and it's Bar Centrale. You won't find tourists here. You'll barely find anyone here except a few well heeled theater goers and the occasional celebrity (rumor has it George Clooney's a regular).
Pro tip
You MUST call ahead and make reservations. At least if you want a table. Day-of reservations will be difficult during prime time—6-8pm. Folks are pregaming for the theater. If you arrive right when they open, you should be able to get a spot at the bar. But the 8 seats fill up quickly, so don't be late!
Details
Website: http://barcentralenyc.com
Phone: (212) 581-3130 [remember what I said about making reservations!]
Location: 46th St, between 8th and 9th. Tell your cab driver “46th & 8th” and walk west toward 9th.
My Favorite Time-Waster Killer
For the past few years I’ve struggled with addiction.
To the news…

For the past few years I’ve struggled with addiction.
My drug of choice? Google News.
Anytime I want a quick hit of distraction, I hit ⌘+T to open a new tab and type news.go—and by then, my browser [dealer] knows what I want and takes me right to Google News.
I go to Google News all the time, but I never click on the headlines.
I don’t know why I’m defending myself.
“I look, but I never touch.”
Nothing good ever comes of going to Google News. I already get my daily news fix in other, more reputable ways. Why do I need to check the news 42 times an hour?
Because I can’t stop.
Until today.
My wife sent me WasteNoTime—the digital equivalent of rehab. And like all the best rehab facilities, it’s free.
Here’s how it works:
- Install WasteNoTime.
- Tell it what sites you want to block.
- Tell it how much time to allow you to visit the sites on the block list. This seems like telling someone to smoke a little less crack each day to ween themselves off of crack. I’d rather go cold turkey and live through withdrawals, so I opted for zero minutes.
- Never do drugs again.
I tried to go to Google News 26 times while writing this blog post. And every time it blocks me.
I’m getting a little jittery. So I’ll end this here.
Wish me luck on the road to recovery. If you or someone you know struggles from Google News addiction, or Twitter, or whatever—send them to WasteNoTime.
I can't put this book down
My current book club book is Destiny and Power: The American Odyssey of George Herbert Walker Bush.
And it is fantastic.
When my friend and fellow book club compatriot, Ross, picked it out, I was a little skeptical. I was alive during Bush’s presidency, but I didn’t really care at the time. [I didn’t get into politics until I was 12.]
But then another friend of mine stood in line for several hours to view the former President’s casket, and gave us one of the little cards they handed out, framed in glass. He described 41 as “our last great president.”
So I started reading Destiny and Power. And I can NOT put it down [which is good, considering my book club meeting is coming up fast!].
I loved learning about his military service, and about the early days when he got into the oil business. I cried [one lone man-tear] when I read about the death of his daughter, and about the camaraderie he shared with Reagan. And I cheered for him when I read of his victory over Dukakis [spoiler alert, Bush wins the presidency!].
But one thing I’ve found most interesting is the background information on the campaigns. I always thought the candidate did all the work. While they do are executing the lion’s share of it, they have a team of people across the country helping out.
I also love reading about the personal connections he tries to forge as a statesman representing our nation in the world. It’s especially fun to compare a president so statesmanlike to our current president. It put things in perspective for me.
So, while I had no opinion when my friend first made the “last great president” comment, I do have an opinion now.
I think I’m inclined to agree.
Buy the book here.
How to Photograph the NYC Skyline and Statue of Liberty...FOR FREE!
Well, it had to happen eventually. I finally made it to Staten Island.
It was the last NYC borough to check off the list. I’d been putting it off for ages because, for as long as I’ve lived in New York, I’ve never heard a compelling reason to visit Staten Island.
I live in Manhattan.
I’ve been to Queens [I was lost] and Brooklyn [to check on the hipsters].
And I’d been to the Bronx a few times: once to watch a Yankees game; once to tour Yankee Stadium; and a third time to buy bootlegged booze from a large Dominican man named Lincoln who made the cash sale…in his Lincoln.
But never Staten Island.
Why?
Because there’s zero reason to go there—as explained to me by everyone I know who lives on Staten Island. Even people I don’t know who live on Staten Island would approach me on the street—with a twitchy eye and pained look on their face—and say, ”d-d-don’t…go there.”
So I never did.
Until yesterday.
I’d heard for years that the best part of Staten Island was the ferry. Mostly because you don’t really have to set foot on the island. But also because riders get great views of the city skyline and the Statue of Liberty.
For free!
And great views I got. And, being the selfless, amazing [and humble] person I am, I wrote a brief article detailing the experience so that you, Dear Reader, could follow in my footsteps.
How to get there
Find your way to Whitehall Terminal. This Google Maps link will take you there. The 1 train will drop you off right in front of the ferry terminal—(get off at the South Ferry Station stop. The R,W also stops nearby—get off at the Whitehall Street Station. The 4,5 drops you off a few blocks away (look for Bowling Green stop), but it’s just a short walk along Battery Park.
Or you can just tell your cabbie, “Staten Island Ferry, please!”
When to get there
Anytime! The ferry runs 24 hours a day, 7 days a week. I know I could have been a cool kid and just said 24/7, but I’m not a cool kid.
The best times for photographing the city and Statue of Liberty are sunrise and sunset, plus or minus an hour, for a few reasons.
For starters, there will be fewer people. Most tourists are on vacation and wake up on vacation time, between 9-11am local time. Add a few hours to get up and moving, and you’re looking at peak tourist time at 12-2pm local time. [I don’t know why I keep saying local time.]
But the most important reason is that sunrise and sunset will yield more beautiful photos. The light will be more interesting, the shadows will be more pleasing—everything is just a little better when the sun is at a dramatic angle. Even before sunrise and after sunset, the city looks marvelous.
How to Ride The Ferry
When you arrive at the terminal, you’ll see a giant sign that reads “STATEN ISLAND FERRY.” If it’s not abundantly clear already, go in the doors beneath that sign.
Congratulations. You’re there.
Really.
Now…wait for the next ferry! At most it’ll be 10-20 minutes between ferry rides.
Even at off-peak times, everyone will start lining up by the doors. Let them. They’re doing that because they want to grab a seat. And you, dear reader, don’t care about a seat since you won’t be sitting.
Someone will announce something over the intercom. It will be unintelligible [they speak Staten Islandese], but the gist is something like “GO GO GO!” That’s your queue to wait for everyone to board the ferry. Hang back a bit if you don’t want to be stuck in the crowd.
But then get on the ferry eventually!
And then..just hang by the back doors. Seriously. Depending on the time of day and the size of the ferry—they run multiple sizes—the back door may be your only option for taking pictures. If the back is completely crowded and the front doors are open, that’s another option.
Once the boat is on its way, one of the crewmen will come back and remove the rope preventing you from going outside. That’s your queue to go outside and shoot!
What to shoot
The skyline and the Statue of Liberty. Both will be visible off the back of the boat. Or you could shoot people. [There’s probably a better way to say that… 😳]
How to shoot
At sunrise and sunset, you won’t have full light. You’ll still have enough to take great pictures, but you’ll want to make sure your lens is fast enough that you don’t have to increase your ISO too high.
I shot most of my dusk photos at 1/50 at f/2.8, ISO 320. If that’s Greek to you, don’t worry. Just shoot in A Mode (aperture priority mode), crank your aperture to the lowest number it allows, and let the camera take care of the rest.
I brought my Canon EF 24-70mm f/2.8L II USM [my favorite lens EVER] for this shoot. About 5 minutes after the ferry departs the dock, you’ll see the full skyline from the back of the boat, and you’ll be able to shoot in all your wide-angle glory. The shot at the top of the page, for instance, was shot at 24mm.
For the Statue, you’ll want to zoom in, otherwise she’ll just be a dainty, green speck on the water. The shot of her on this page was at 70mm and heavily cropped.
And then?
A few minutes before docking on the Staten Island side, you’ll hear another announcement. It’ll sound something like “PUMBLY PUM PUM PAWPERAYY.” Translating from Staten Island-ese, they’re saying “We’re about to dock. Get ready to get of the boat, make a U-turn, and head home!”
And that’s exactly what you should do. Everyone will line up to get off the boat, and again, you can hang towards the back if crowds aren’t your thing…
You’ll dock.
You’ll deboat [not a word].
Go into the terminal, hang a left, walk past a few vending areas, and then hang another left to enter the waiting area. Wait for the next boat (likely the same boat you just rode), and head home!
And don’t forget!
On your way home, you’ll have another chance to shoot the city AND the Statue. Head to the front of the boat and open a door. It’s okay to open on of the doors even if they have the ropes up preventing you from going outside. [Everybody does it.]
Questions? Comments? Concerns? Drop them in the comments below!
Don’t forget to subscribe to my newsletter. It’s funny.
Comic's Corner: What To Do While You Bomb
Telling the audience over and over that they suck ostracizes them. It makes them feel like it's their fault.
And it's not.
It's ours.
Photo by Edu Lauton
Photo by Edu Lauton
I just got home after watching two comedy shows.
4.5 hours of mostly terrible comedy. And I don't use the word terrible lightly. [Only heavily.]
Most of the time, I'm a "there's a comedy type for everybody" kind of guy—I'm annoyingly optimistic—but I watched comic after comic perform a joke, die inside and out, and then immediately blame the audience for not laughing.
“That killed at the earlier show!”
“You guys don’t know good comedy!”
“Tough crowd.” [yes, people are still saying that…]
“Everyone can unclench their assholes now, okay?”
Being told they're stupid for not being able to identify a joke is the number one reason people come to comedy shows! 😐
Every comic bombs [except me]. And that's okay!
But a strong comic understands that there will be good and bad rooms. Good and bad audiences. Good and bad jokes. But they run their set and refine based on audience response. If the audience doesn't laugh, the strong comic doesn't blame them.
He uses them to get stronger.
So, wise Anthony. How do I remedy the situation? What should I do when I bomb?
First, I’m grateful you acknowledged my wisdom.
Hardly anyone does. ["They don’t know good wisdom!”]
Second, embrace the situation.
Call it out.
Acknowledge you're bombing. The audience already knows it! And the sooner you let them know that you know that they know you’re bombing, the sooner you can get back on their side.
Or not!
Your job is to make them laugh. And maybe you’re just having a bad day at the office. That’s fine. Finish your set, go home, and work on strengthening your act.
How do I let them know I’m bombing?
Just say it!
A while ago I heard one comic use the line “You’re not seeing a comedian bomb, folks. You’re seeing a spoken word performer kill.”
The crowd laughed.
And just like that they were back on his side.
Telling them over and over that they suck ostracizes them. It makes them feel like it's their fault.
And it's not.
It's ours.
How to Not Be An Idiot When Visiting NYC Series: How to Walk on an Escalator Without Upsetting The World.
If you're visiting from another state, country, or planet [welcome, aliens!], there are several things that humans do in New York differently [more efficiently] than anywhere else.
Ride Right, Pass Left.
This is an similar to the driving rule in most of the developed world [except Washington State]. The rule is drive right, pass left. That means you should NEVER be in the leftmost lane unless you're passing another vehicle. Also, you should never pass on the right. That's how car accidents are made.
The same holds true for escalators in New York. If you're not in the mood to walk up the escalator, just pull over to the right hand side. There's no shame in not walking up the escalator. I've done it! [Once.]
Whatever you do, do NOT hang out on the left side of the escalator. If you're in a party of two, and neither of you feel like hoofing it up an escalator—or if you say things like "that's why they invented moving stairs, Rebecca, let the robot lift me!—do NOT stand two abreast on the same stair. Both of you should pull over to the right.
I’ll say it again: Don’t Stand Two Abreast on an Escalator!
The nice thing about New Yorkers is that, contrary to popular belief, you're not going to get yelled at for riding an escalator incorrectly.
You'll just get stabbed.
Safe Travels!
Questions? Comments? Drop them in the comments below!
How I Used Planoly to Market My Book Release

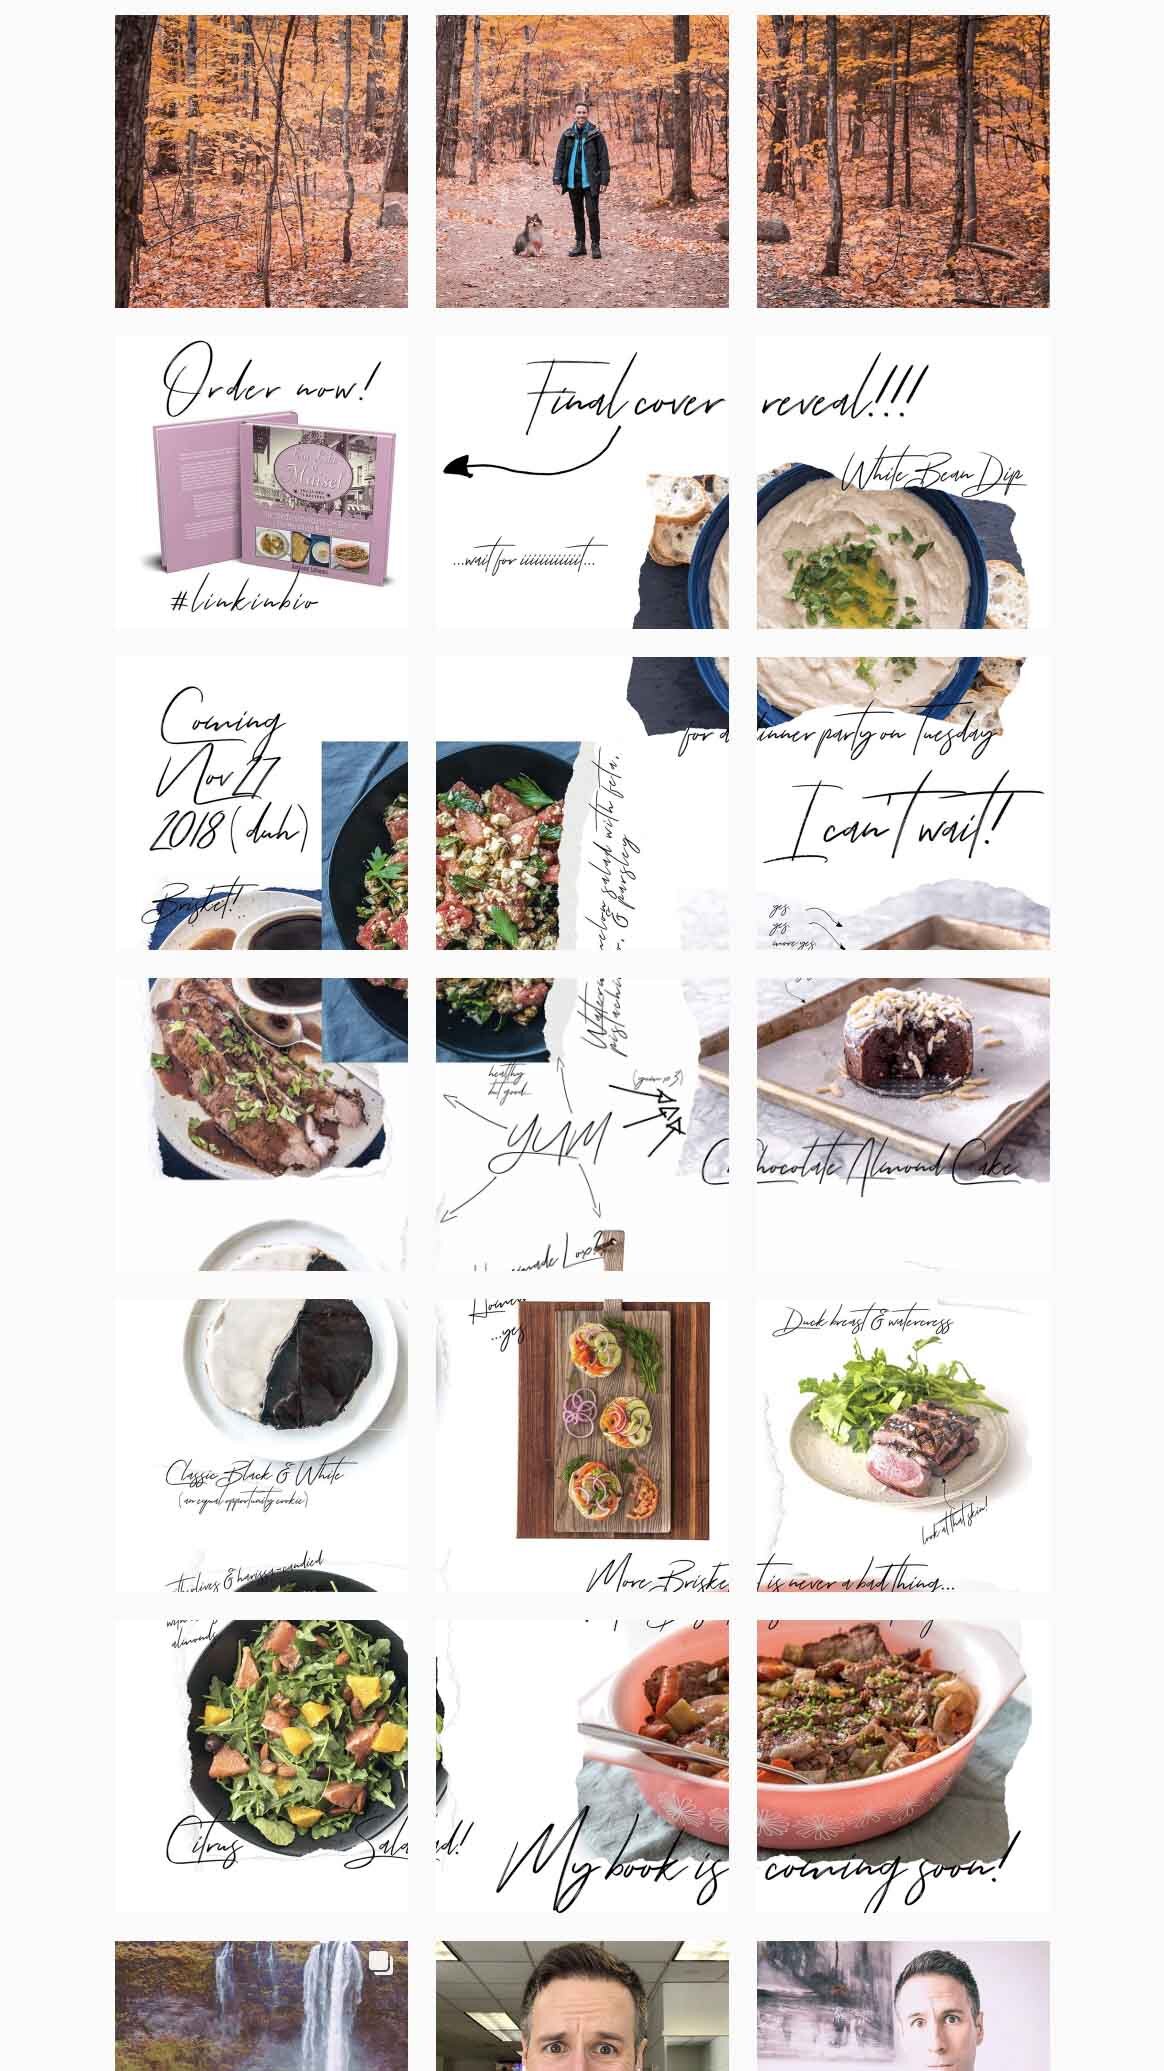 Isn’t this cool?!?
I use Planoly to schedule Instagram posts. I LOVE it. It makes everything easier. And by “everything” I mean “I don’t wake up dreading knowing that my first todo item of the day is Post To Instagram.”
Instead of waking up in a cold sweat wondering how I’m going to motivate the world with an image I don’t yet have and a fantastic quote I haven’t written, I sit down for a few hours and have a dedicated Instagram planning session.
It.
Is.
Epic.
What exactly do I do?
Lemme tell you using a specific example.
A few months ago, I wanted to publish a series of posts as a countdown of sorts until the day of my book release.
I planned and scheduled 15 posts featuring recipes from the book. I opted to do a "puzzle", where images and text straddle Instagram's diving lines. You can keep things simple and not do this.
Or you can do it.
Your call.
I liked it because it looks SO cool once all the images are on the grid.
Here’s a down-and-dirty primer on how to schedule sweet Instagram content like this…
Note: You’ll need to switch your Instagram account to a Business profile to use auto-posting with Planoly. Check out Planoly’s instructions on that here.
1. Collect Your Content
If you're doing a puzzle, design and export the images. I used Photoshop for this. Use whatever you're comfortable with. If you're NOT doing a puzzle, just collect all the images you'd like to use in one folder. This just makes dragging and dropping them into Planoly that much easier.
Starting a puzzle from scratch? Feel free to use THIS Photoshop template for a 3x3 grid and THIS Photoshop template for a 3x5 grid.
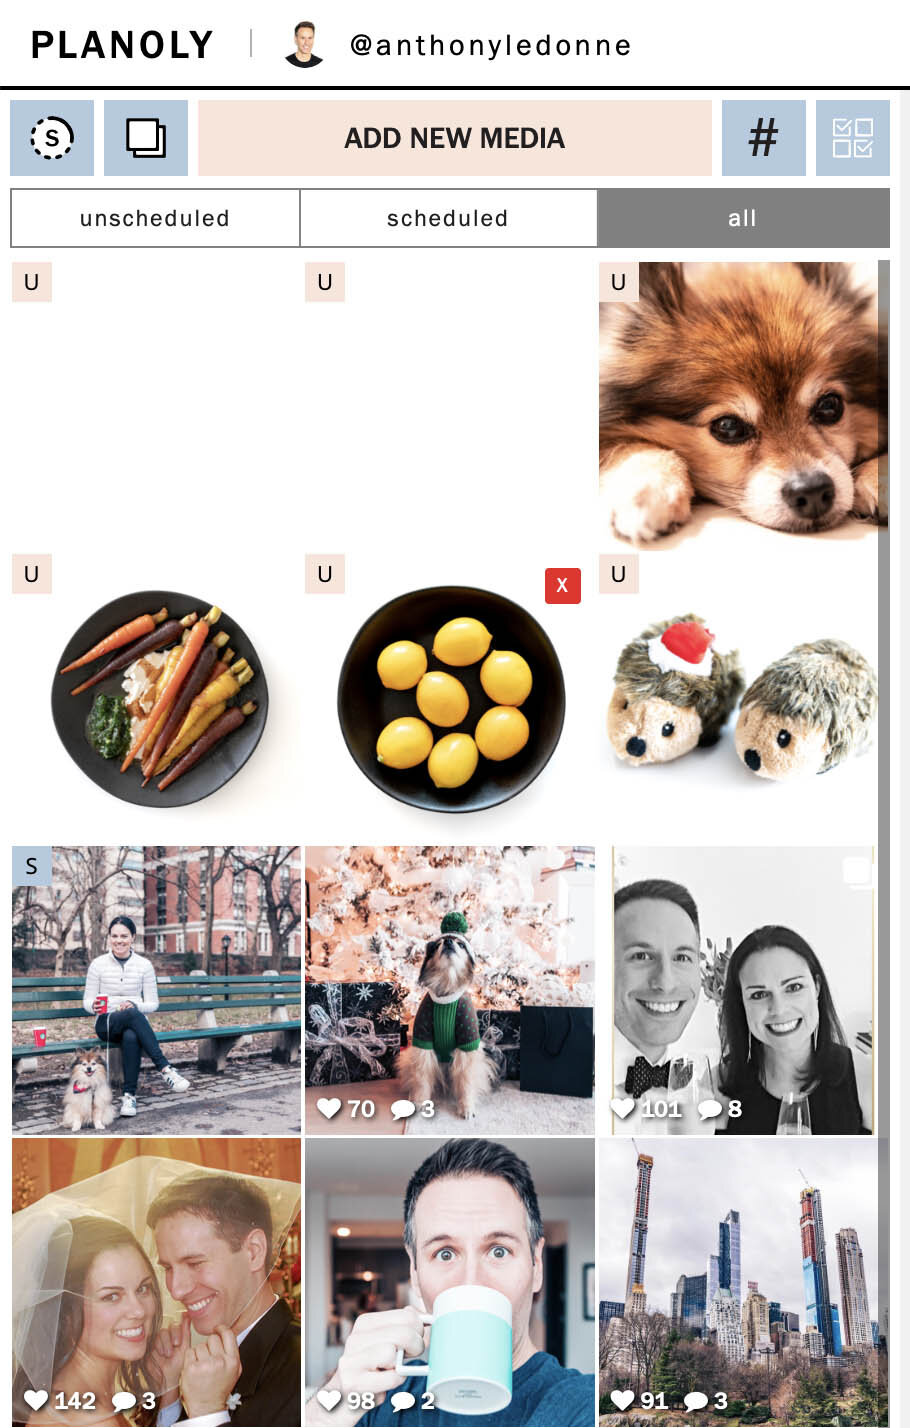 click to enlarge
2. Drag, Drop, and Rearrange in Planoly.
This is the easiest part. Just drag and drop all your images into Planoly. Give them a moment to upload. Once they're finished, rearrange them so they're in the order you want.
3. Fill out the caption and tag people and brands.
Creating great captions is beyond the scope of this article [and my knowledge]. If you have any pointers, drop them in the comments below!
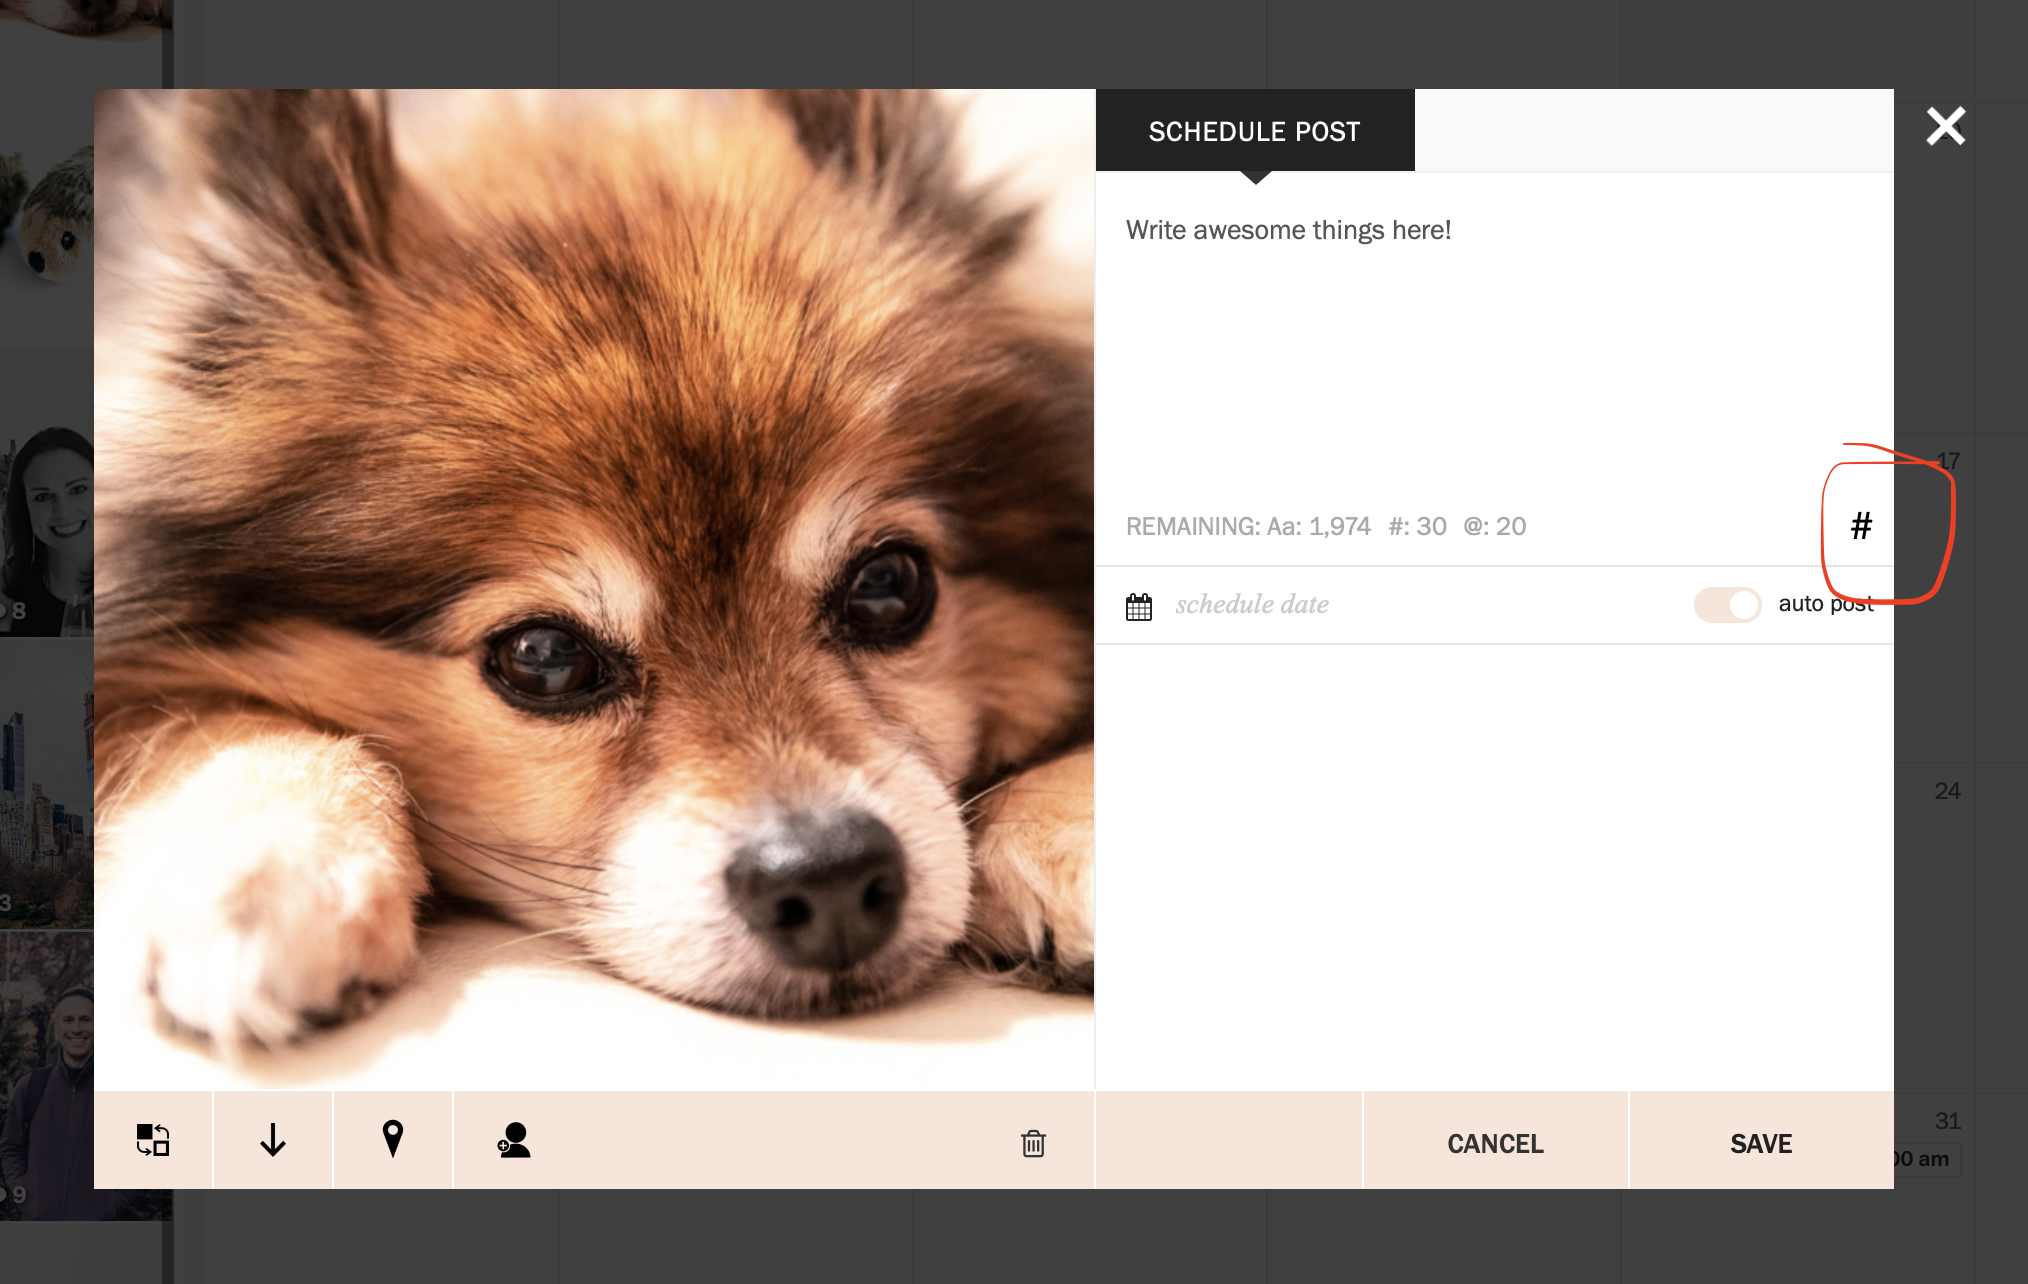 click to enlarge
4. Select hashtags.
I was copying and pasting commonly used hashtags from the Notes app on my phone until this. Planoly makes it SUPER easy to reuse hashtags.
To create a hashtag group:
1. click the pound sign,
2. click the pink “CREATE A NEW GROUP” button,
3. add a name and hashtags,
4. click save.
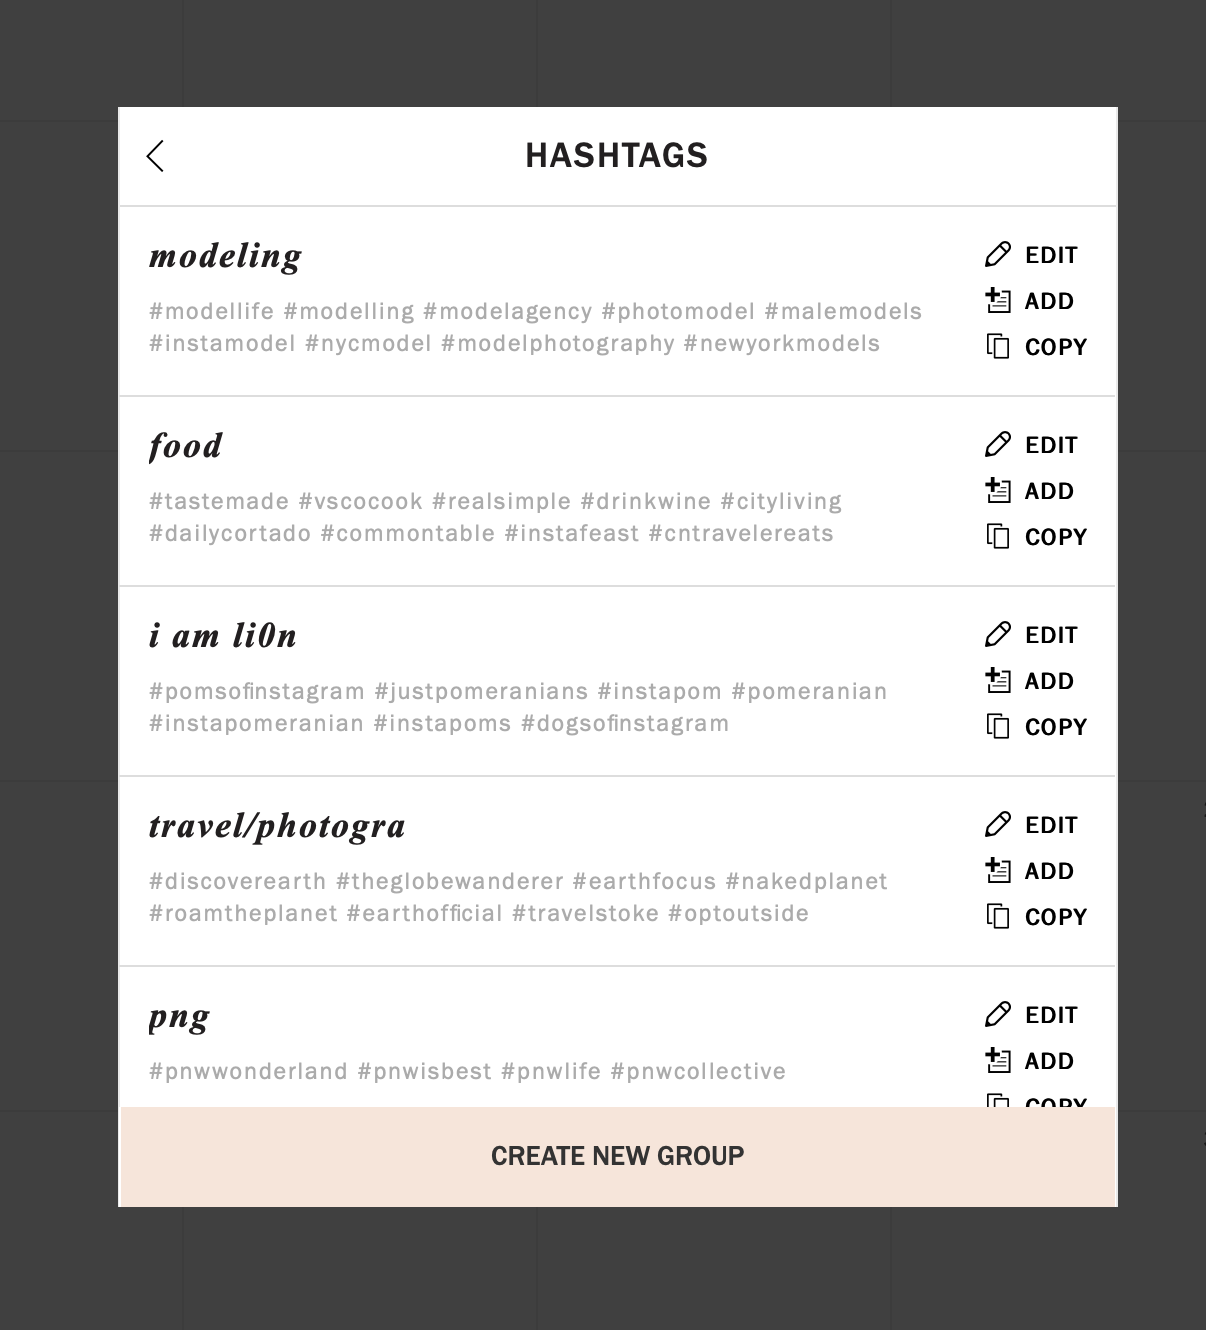 click to enlarge
To add that hashtag group, click “ADD” next to the group you want to add. They’ll appear in the caption. I usually add a few returns between my caption and my hashtags.
That’s another nice thing about Planoly, it preserves hard line breaks so everything doesn’t run together—which is the default behavior when you’re pasting stuff directly into Instagram.
5. Schedule
Sweet! Now you’ve got your image, you’ve got your caption. All that’s left is to schedule it. Pick a day and time in the future. I know, it’d be AWESOME to post in the past [I think?], but you’ve gotta schedule it for the future.
That’s how time works.
Click in the schedule date field next to the auto post switch, and select your date and time.
6. kick back, relax, and enjoy the calm
That’s it! Now you’ve got your daily Instagram scheduled for as far out as you want. Doesn’t it feel good knowing that you won’t have to worry about it EVERY SINGLE DAY?
Go pour yourself some Champagne or Scotch—or both!—and celebrate.
Was this helpful?
If so, don’t forget to subscribe below. If you have questions, hit me up in the comments section!
4 steps to making your own cocktails on vacation
Despite the rugged good looks and indescribable charm, this is not a world-famous model. It is me. I'm on vacation drinking a Negroni.
Despite the rugged good looks and indescribable charm, this is not a world-famous model. It is me. I'm on vacation drinking a Negroni.
Wiff and I love road trips almost as much as we love drinking cocktails while on road trips.
But it’s nearly impossible to find good quality cocktails on road trips. Hell, it can be tough to find good cocktails in major metropolitan cities. So that means we’re usually BYOB’ing it to every hotel/motel we stay in.
The first time we took a cross country road trip, we had a trunk full of booze. That may seem extreme. It was.
But we had a pretty good excuse: We were moving at the time. I didn’t want to throw away all those pretty, precious bottles!
Every stop we’d make, I’d grab the bags out of the trunk, and we’d make the decision, “What cocktail do we want tonight?” I’d then grab the appropriate bottles, my mixing equipment, and we’d be on our merry way.
But then we wisened up.
We started paring down our selection so we could pack less.
What?!? A trunk full of booze was too much?
Yeah. It got to the point where I’d skimp on clothes just to make room for bottles just in case we wanted a margarita. You can only flip your underwear inside out twice before you think there MUST be a better way!
And there is!
BATCH YOUR COCKTAILS!
As the family bartender, I usually pack premixed cocktails because the last place I want to be is standing at our room's wet bar mixing cocktails [I'd rather be drinking them].
So I premix cocktails and put them in Swell bottles.
My go to?
Here’s how I rock the CWV [cocktailing whilst vacationing] lifestyle:
STEP 1: CHOOSE A COCKTAIL
You're on vacation. You don't want to think. So do the picking and choosing before you leave. Pick a cocktail (or two) that you love and will still love by the time you reach your destination.
STEP 2: SCALE UP.
Most cocktail recipes are scaled for one drink. But since the invention of math, we've had the ability to multiply things to scale up to proper vacation quantities. Dust off your first grade multiplication tables and scale up that recipe.
My favorite drink is The Negroni. It's equal parts gin, Campari, and sweet vermouth, which makes batching quite easy.
The recipe is 1oz gin, 1oz Campari, and 1oz sweet vermouth.
A 750ml Swell bottle is 25 ounces. 25 ounces divided by 3 (1 ounce each per ingredient) is 8.33 ounces.
So I need to measure 8.33 ounces of each ingredient. 8.33 ounces is just about 1.25 cups.
Okay, Anthony, but what about a cocktail with different ingredients?
Let’s use a Manhattan as an example.
My Manhattan recipe is 2oz bourbon or rye, 3/4 ounce sweet vermouth, and 2 dashes of bitters.
THE FORMULA:
CONTAINER SIZE (in ounces) divided by TOTAL DRINK SIZE (in ounces) multiplied by EACH INGREDIENT (in ounces)
Here’s the Manhattan example for a 750ml (25 ounce) Swell bottle:
25oz / 2.75oz = about 9 cocktails
9 * 2oz bourbon = 18oz bourbon
9 * 3/4oz sweet vermouth = 6.75oz sweet vermouth
9 * 2 dashes bitters = 18 dashes bitters
One more, please. Just so I can get the math right.
Coming right up! How about the Mint Julep?
THE FORMULA:
CONTAINER SIZE (in ounces) divided by TOTAL DRINK SIZE (in ounces) multiplied by EACH INGREDIENT (in ounces)
My Mint Julep recipe is 2oz bourbon, 1/2oz simple syrup.
25oz / 2.5oz = 10 cocktails
10 * 2oz bourbon = 20oz bourbon
10 * 1/2oz simple syrup = 5oz simple syrup
STEP 3: MIX
I put everything in a Swell bottle. Why? Because they look like water bottles. Everyone carries water bottles these days [because they're going to places without potable water]. And people don't judge people carrying water as much as they do those carrying booze.
STEP 4: POUR
When you get to your destination, pour yourself a drink. You deserve it.
Just The [camera] Tip: How to Take Pictures with Blurry Backgrounds
This post may contain references to products from one or more of our advertisers. I may receive compensation when you click on links to those products.
If you’re anything like me [handsome, worldly, and humble] you love taking great pictures. I love taking pictures with blurry backgrounds because it helps separate my subject from the background. Also because it just looks pretty.
But if you’re new to the world of big-boy and big-girl (DSLRs and Mirrorless) cameras, achieving that effect is tricky.
Here’s a my quick tip for making sure you nail your blurry background.
-
If you don’t want to shoot full manual—M Mode—shoot in A mode.
Not any mode. A mode. A mode is also known as aperture priority mode. Don’t worry what that means. You don’t need to know to shoot great photos. -
Crank down your aperture. Depending on your camera, this will be in different spot. Refer to the manual. I know, super boring.
1.4, 1.8, or 2.8 is what you’re going for. If your lens came with your camera, the lowest number may be 3.5 or 5.6. That’s okay too. The point is, find whatever dial controls your aperture, and crank that puppy down.
Here’s an example of the same photo taken with two different apertures.
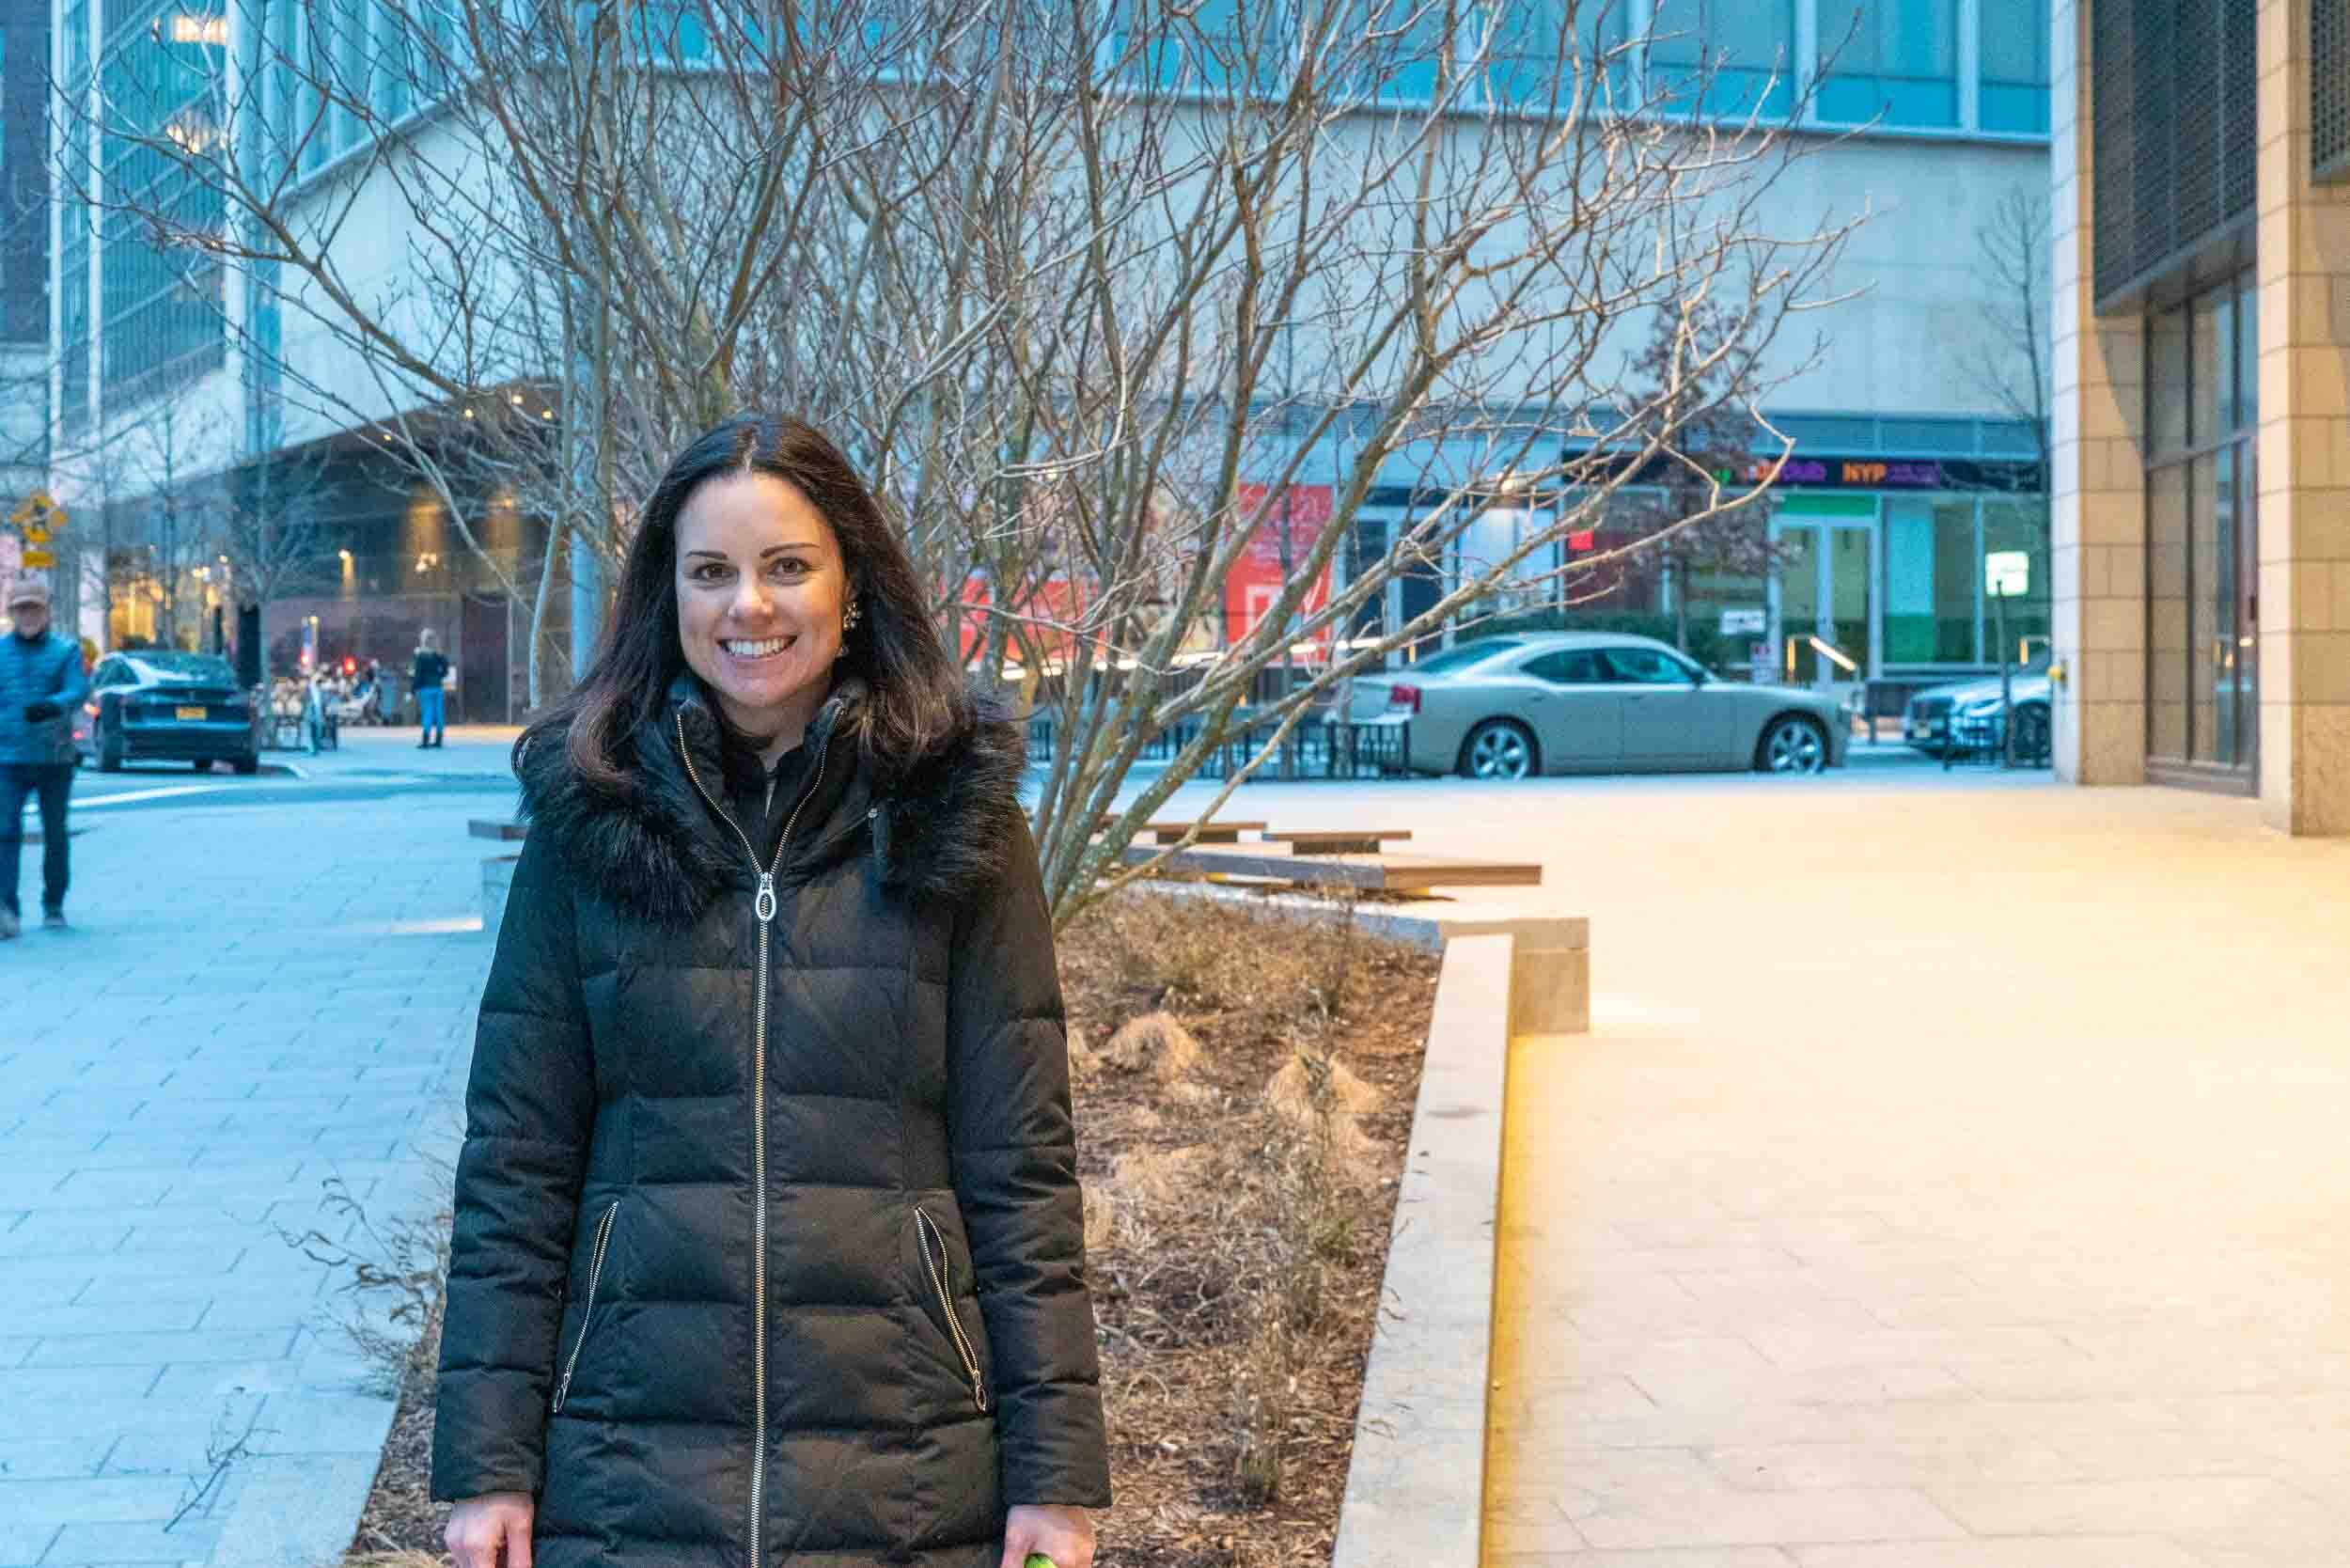
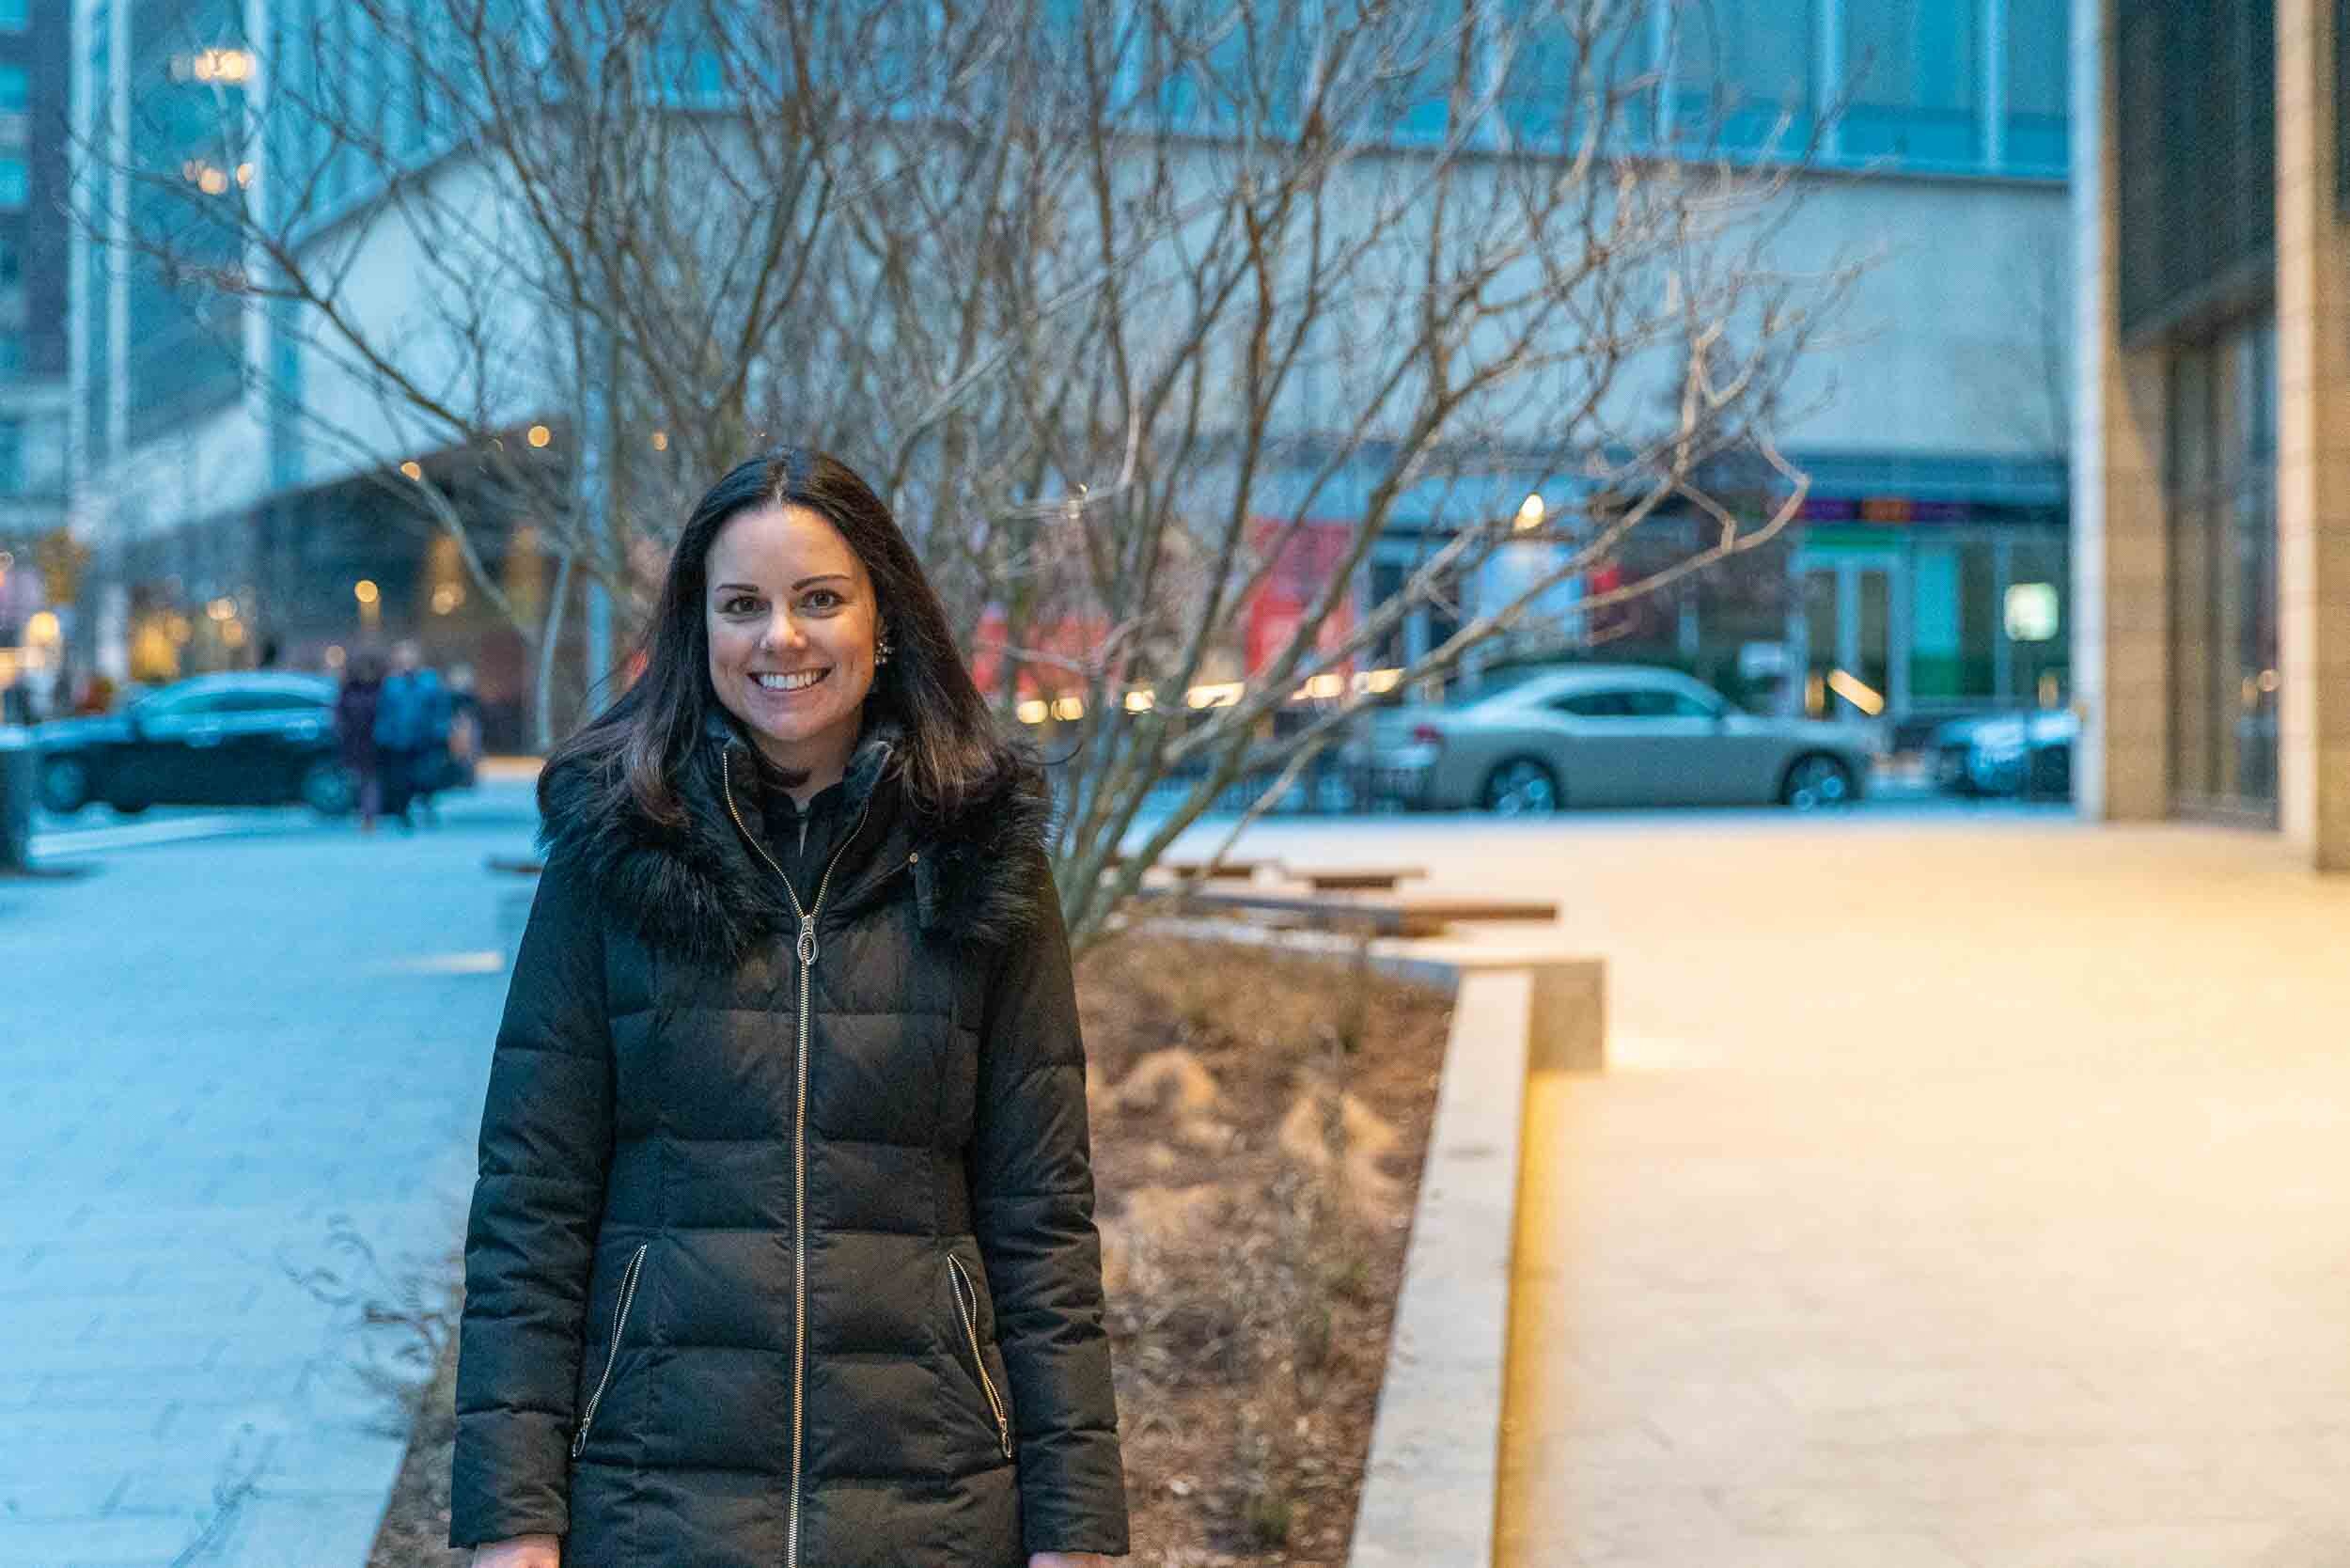
Do you see how in the NOT BLURRY photo, you can still make out words and letters in the background? The lights look sharper, the rims of the car are fairly sharp.
But check out that BLURRY photo. The words, lights, and rims are all blurred, drawing your attention back to my model [Wiff].
Here’s a closer look:
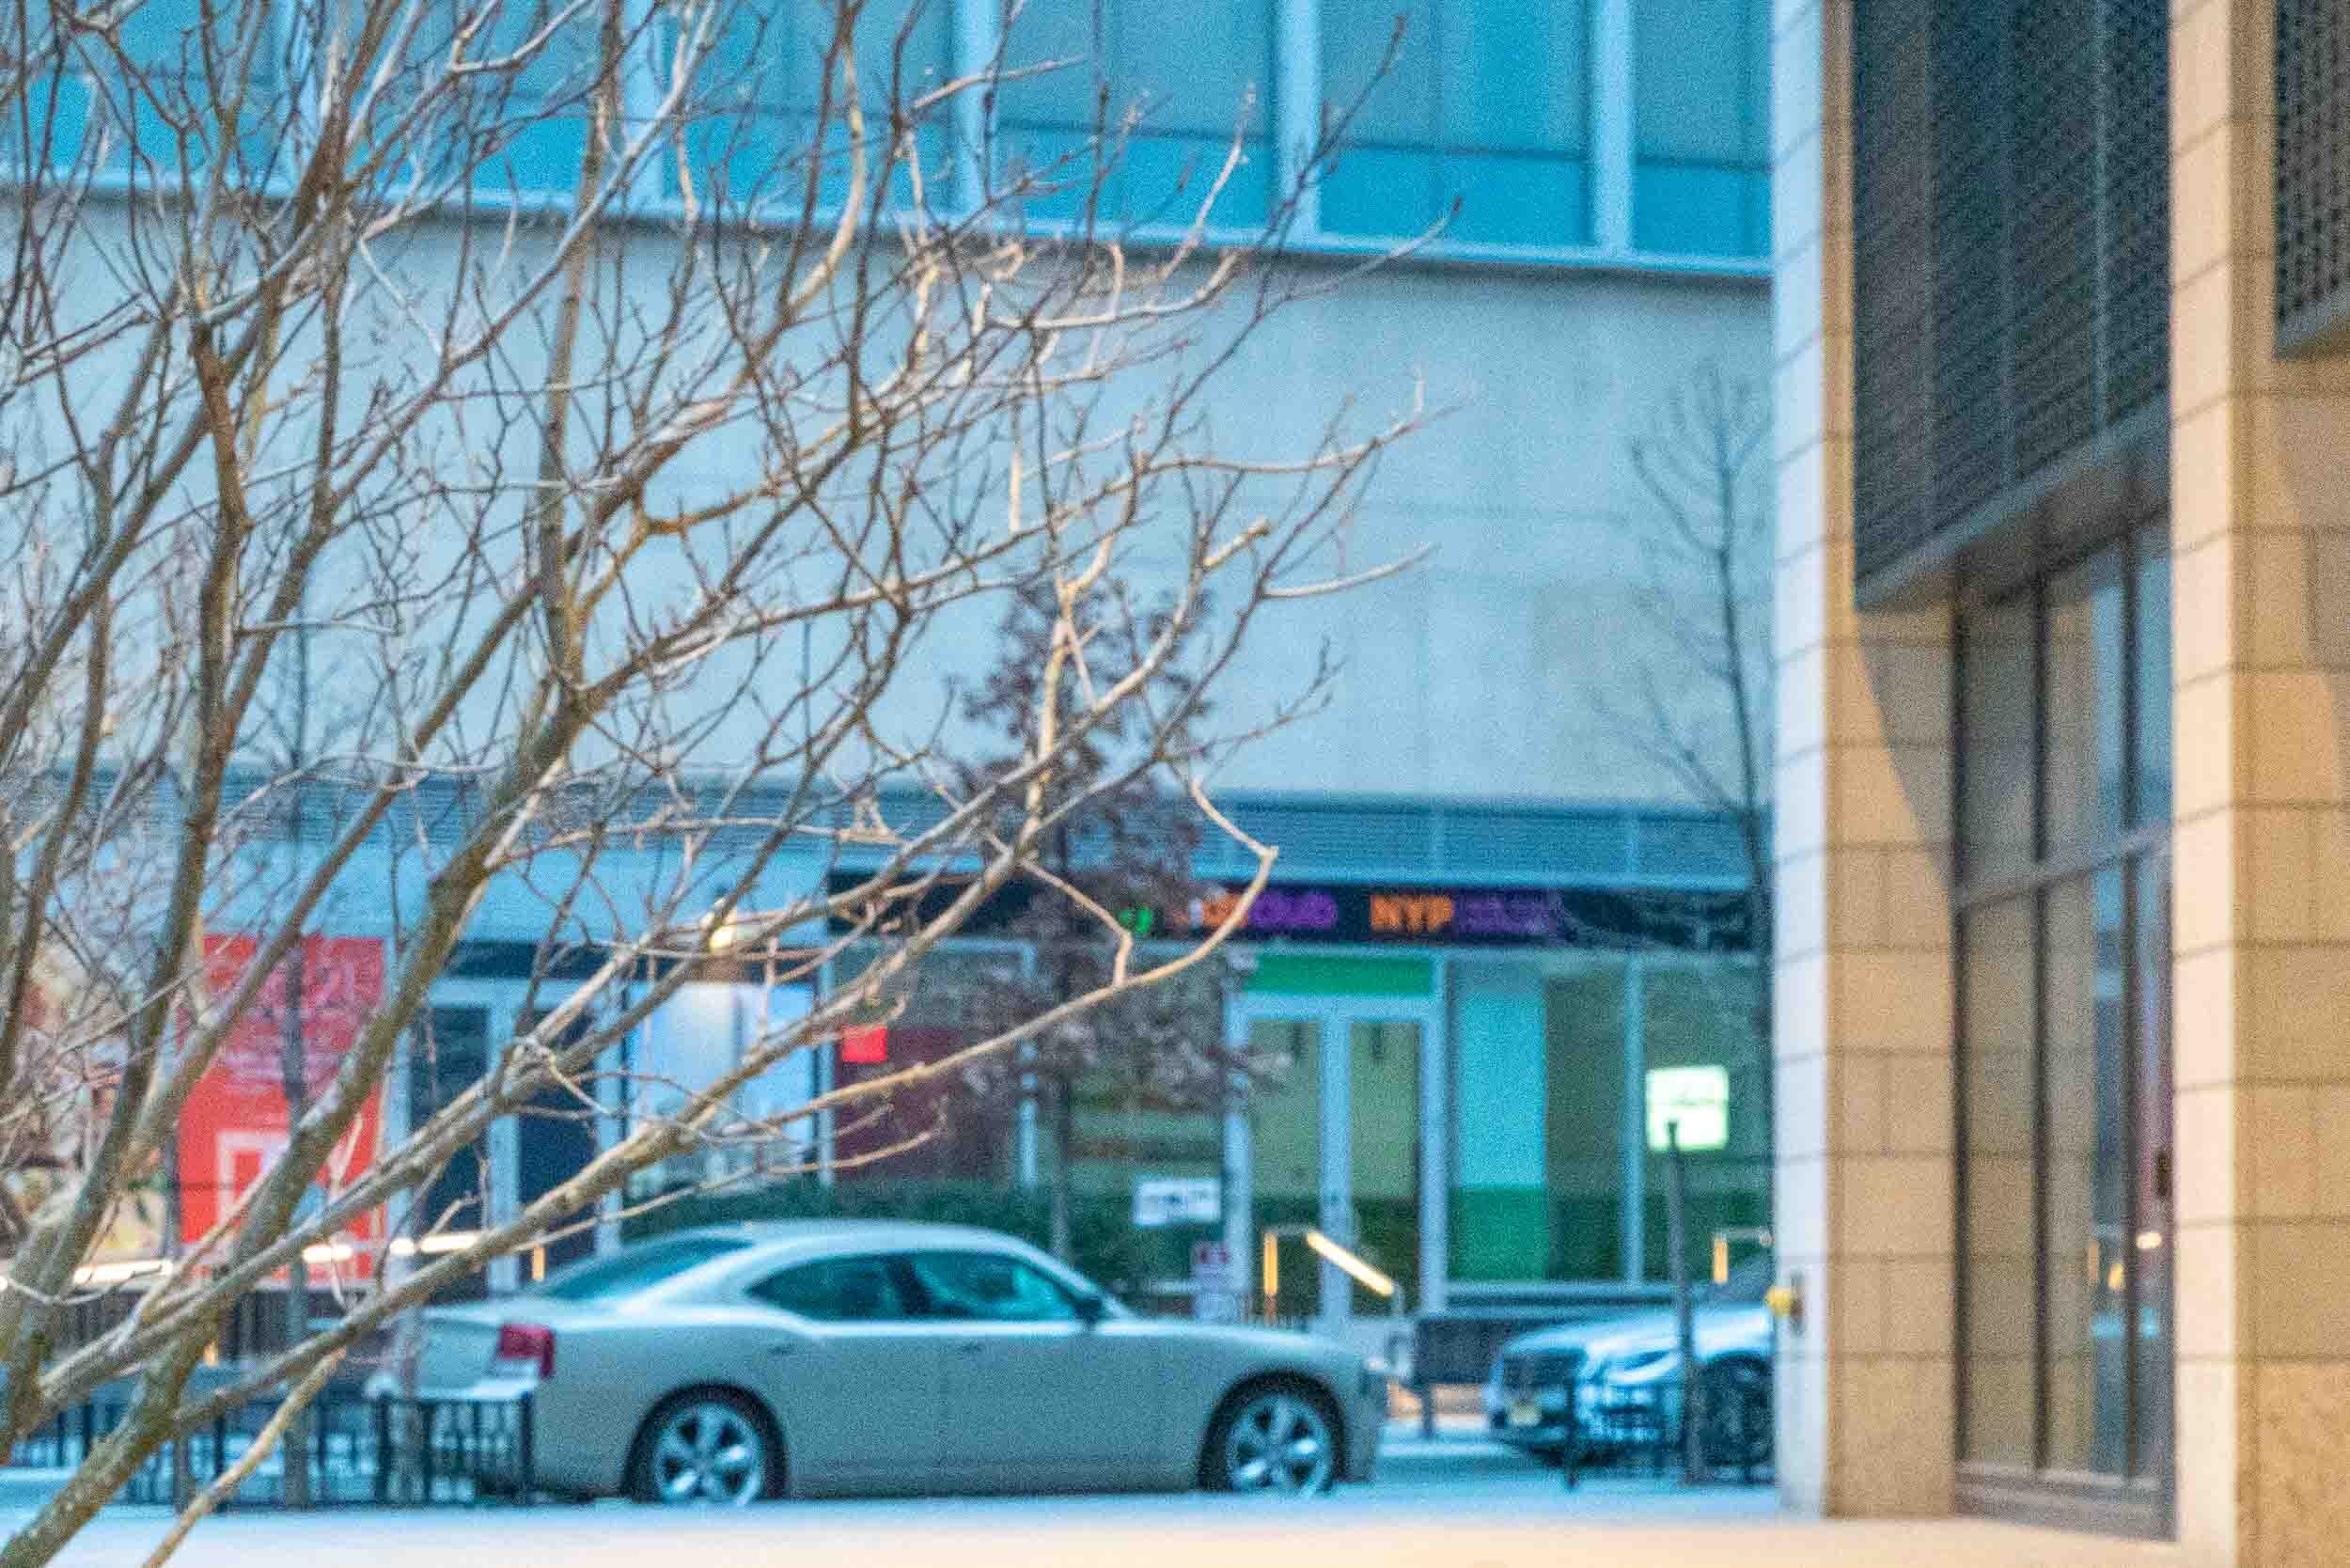
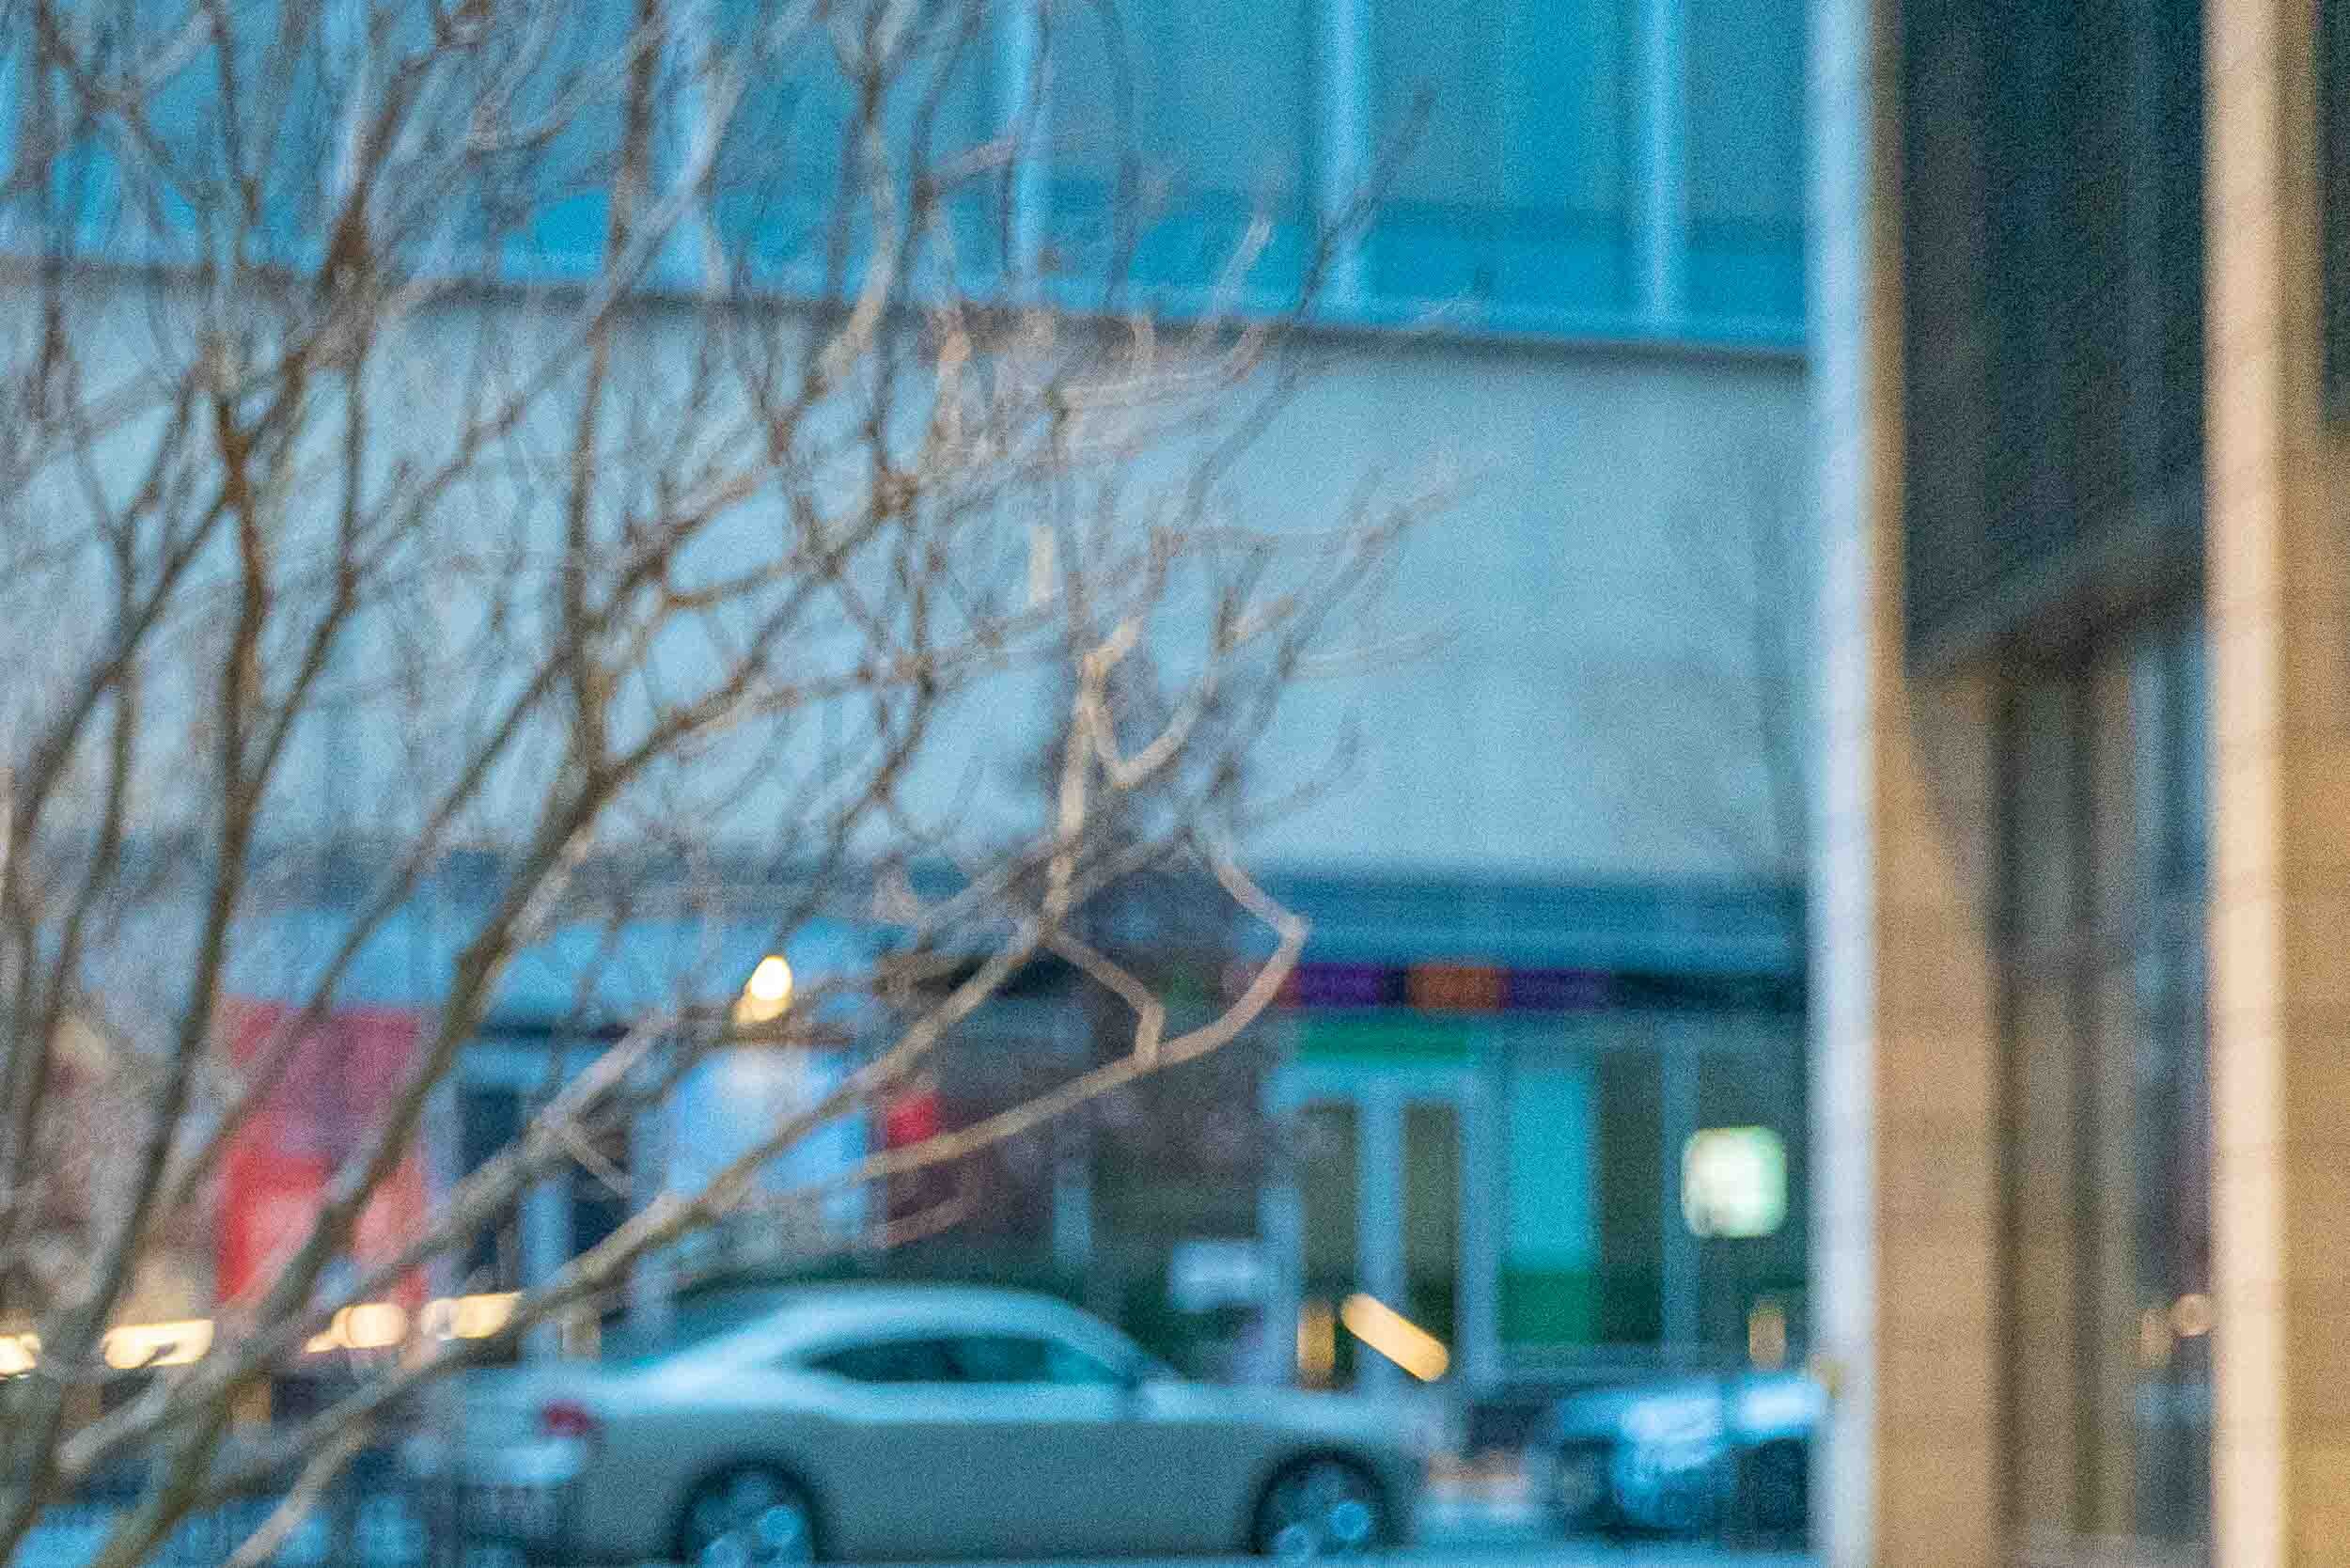
So there you have it. A quick tip on what camera settings will lead to a blurrier background.
Now that you’ve mastered shooting with a blurry background, you may want to consider how you’ll edit those sweet sweet new shots. I use Adobe Lightroom for almost all of my photo editing. Check it out here.
If you enjoyed or found this helpful…
…don’t forget to leave a comment and subscribe below!
Twas The Day After Christmas
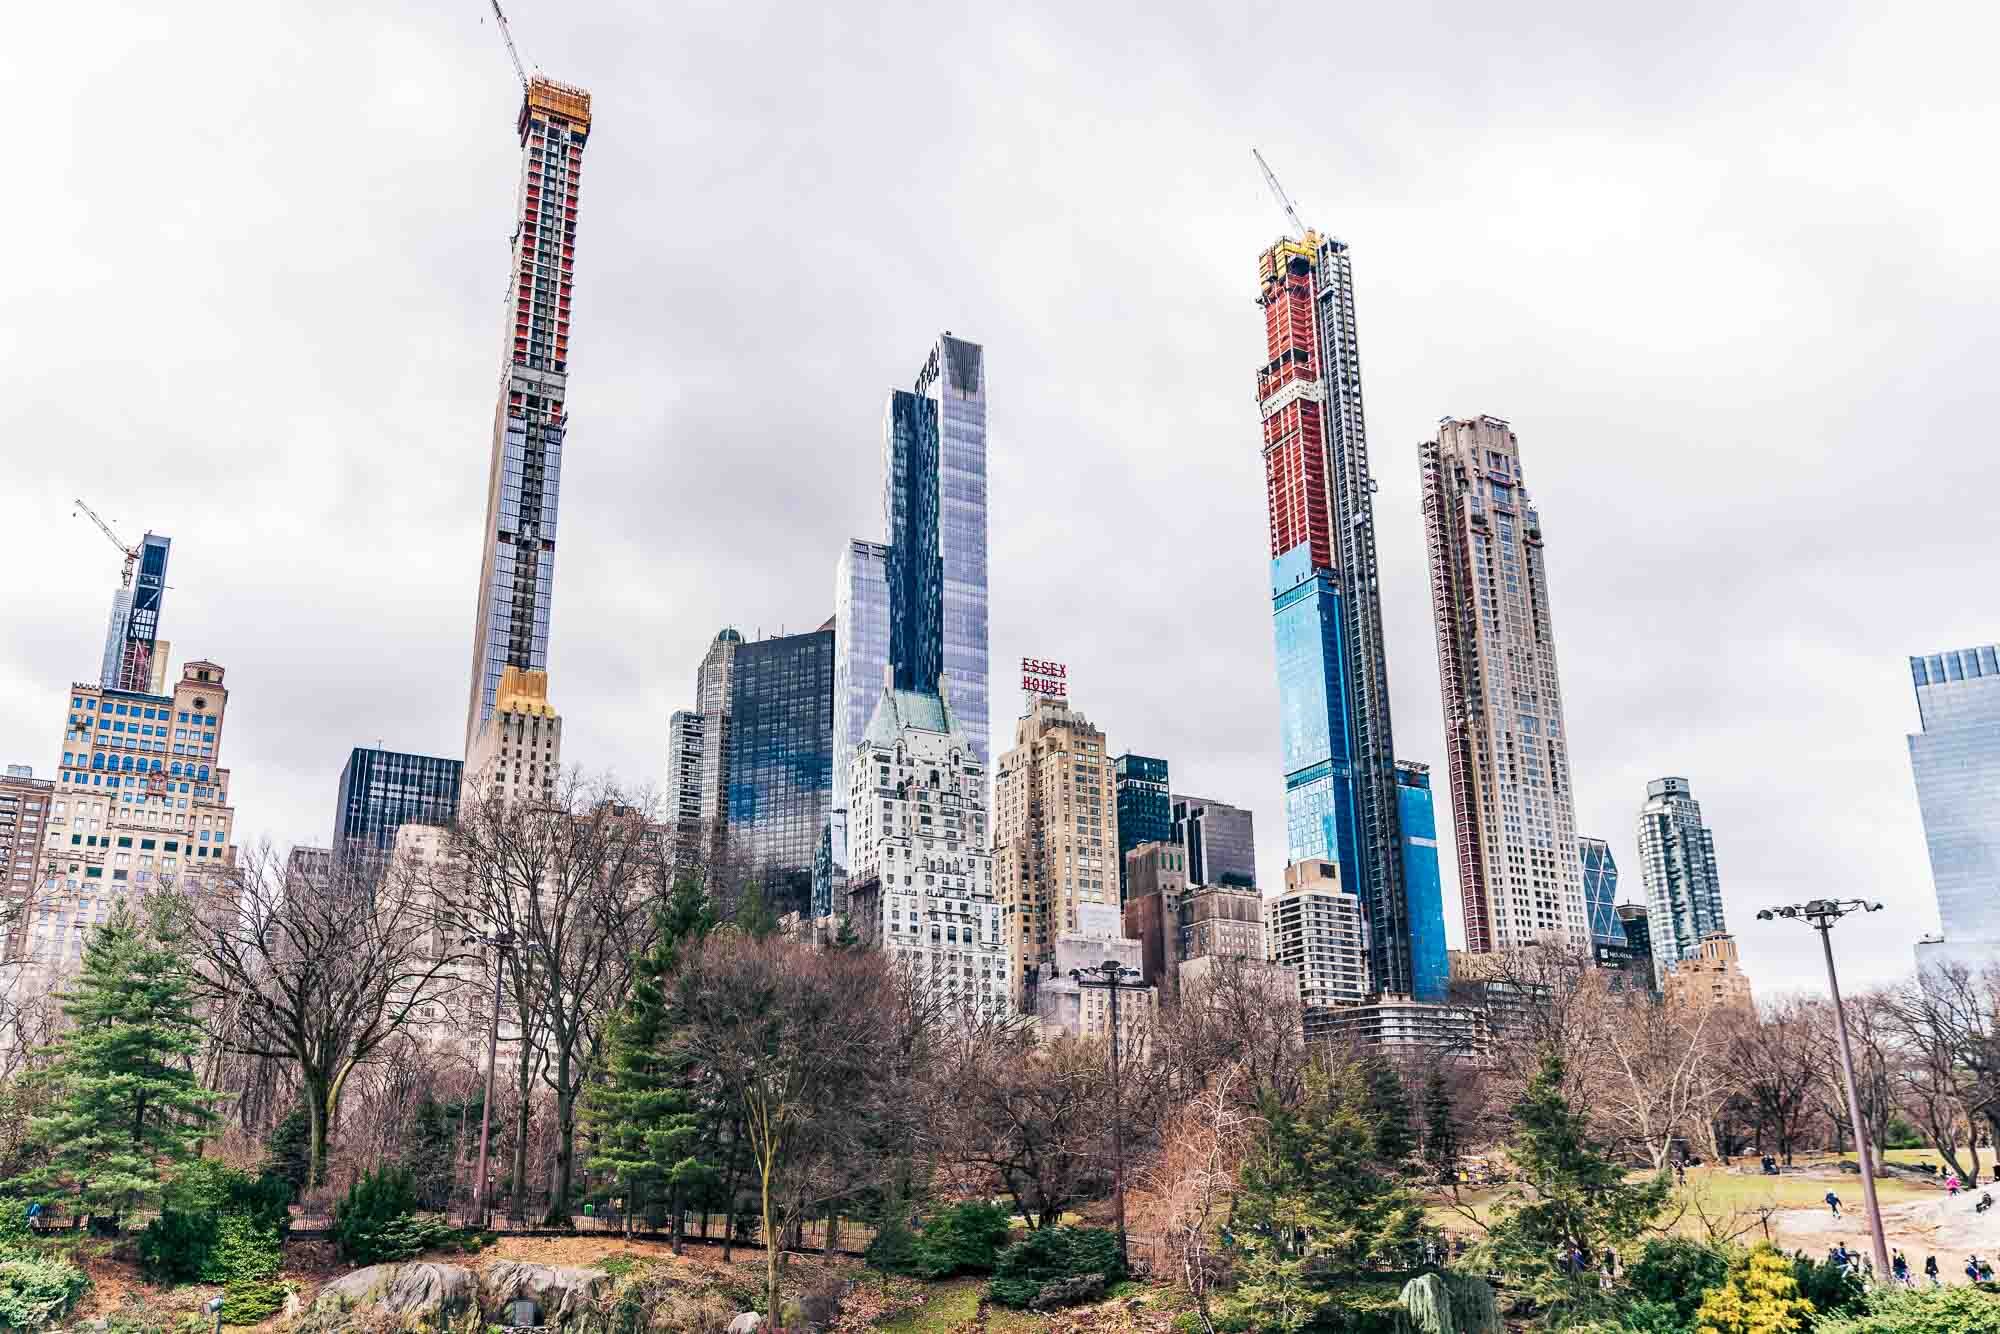
I love the day after Christmas.
All the duties of the holiday are past. The crowds of shoppers have returned to their homes with full bellies and empty wallets.
It’s the first winter stillness we feel all year.
And it’s perfect for reflecting.
As I write this, on the day after Christmas, I have a cold. It’s minor, but present enough to annoy me. I’m sipping a Negroni—for the Vitamin C in the orange peel, I tell myself—and taking a minute to enjoy this feeling of having absolutely nothing to do on my calendar.
Can you think of any other time of the year like this?
I can’t.
I have nothing to do except plan for the new year.
For the last several years, Wiff and I have planned together using a workbook she designed called Life By Design (LBD for short). It's awesome. If you feel like you want to get a jump start on planning your life, grab it while it's on sale. [She made me pay full price.]
What’s on the plan, you [didn’t] ask?
I’m going to write a cookbook of small plates.
I’m going to write and produce my own comedy special.
I’m going to publish a blog post every day.
I’m going to publish new material every Monday.
…
That’s as far as I’ve gotten. I got up to blow my nose, pour another Negroni, and then forgot what else I had been planning on doing.
Guess I better add a todo for tomorrow: finish new year planning.
An Update On My book
A good old fashioned book burning.
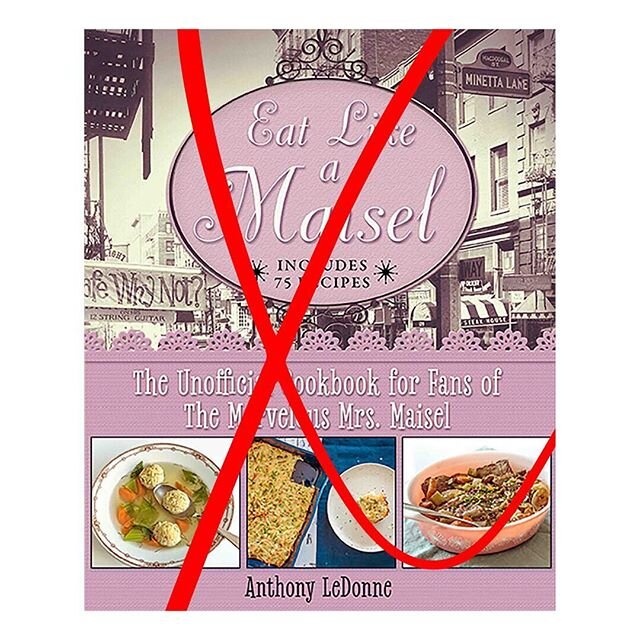
I have an update, Dear Fans! [mom]
My book was supposed to be released this past November 27th. It was not.
The long story short: due to legal issues that are WAY above my pay grade, my book will never see the light of day.
These pretty little books are waiting in limbo in a warehouse somewhere. [Probably New Jersey—which, if it isn’t Hell, is a close second.]
I don’t know their fate. I hope they can be saved. Maybe they can’t be sold, but what about donated?
Unfortunately, I think they’re headed for the incinerator.
Thankfully, the first print run was small—only 8000 units. [Units is the technical term for “books” when you work in the unit industry.]
If you, or anyone you know, knows the whereabouts of the warehouse, please let me know.
Also, if a pallet happened to fall off the back of the truck en route to said incinerator, I wouldn’t mind. This isn’t as farfetched as one would imagine. It the warehouse is in New Jersey, the driver is guaranteed to be Italian.
Now… For THE update!
I started another book!
Like my first book, it’ll be delicious, informative, and fabulous.
Unlike my first book, this one doesn’t have a publisher. I know it sounds weird, but this might improve my chances of getting it published.
In a traditional publishing model, I’d have to compromise on everything—the design, the title, and ESPECIALLY the paycheck. [Side note: did you know that most cookbook authors take home around 8% of the book’s cost?] And that’s okay. Most of the time, I don’t mind compromise.
But I have such a strong vision about what recipes I should include, how it should look, and how it should read, that I don’t want to compromise.
I’m not saying other publishers can’t accommodate my vision—first, I’m not that much of a diva that my vision needs accommodating, and second, my experience with editors has been nothing but pleasant—but I’m much more interested in recipe testing, writing, and photographing than I am having to stet a proofreader’s notes about what’s “a little too joke-y, trivializing given the current state of race relations” [an actual proofreader’s comment regarding my Black and White Cookie recipe].
With all that in mind, I’ve started this new project. The first thing I do when starting a new project? Figure out what I want and how to get there. The second thing? Take stock of my supplies to ensure I’m prepared.
To prepare for this new book, I made duck stock.
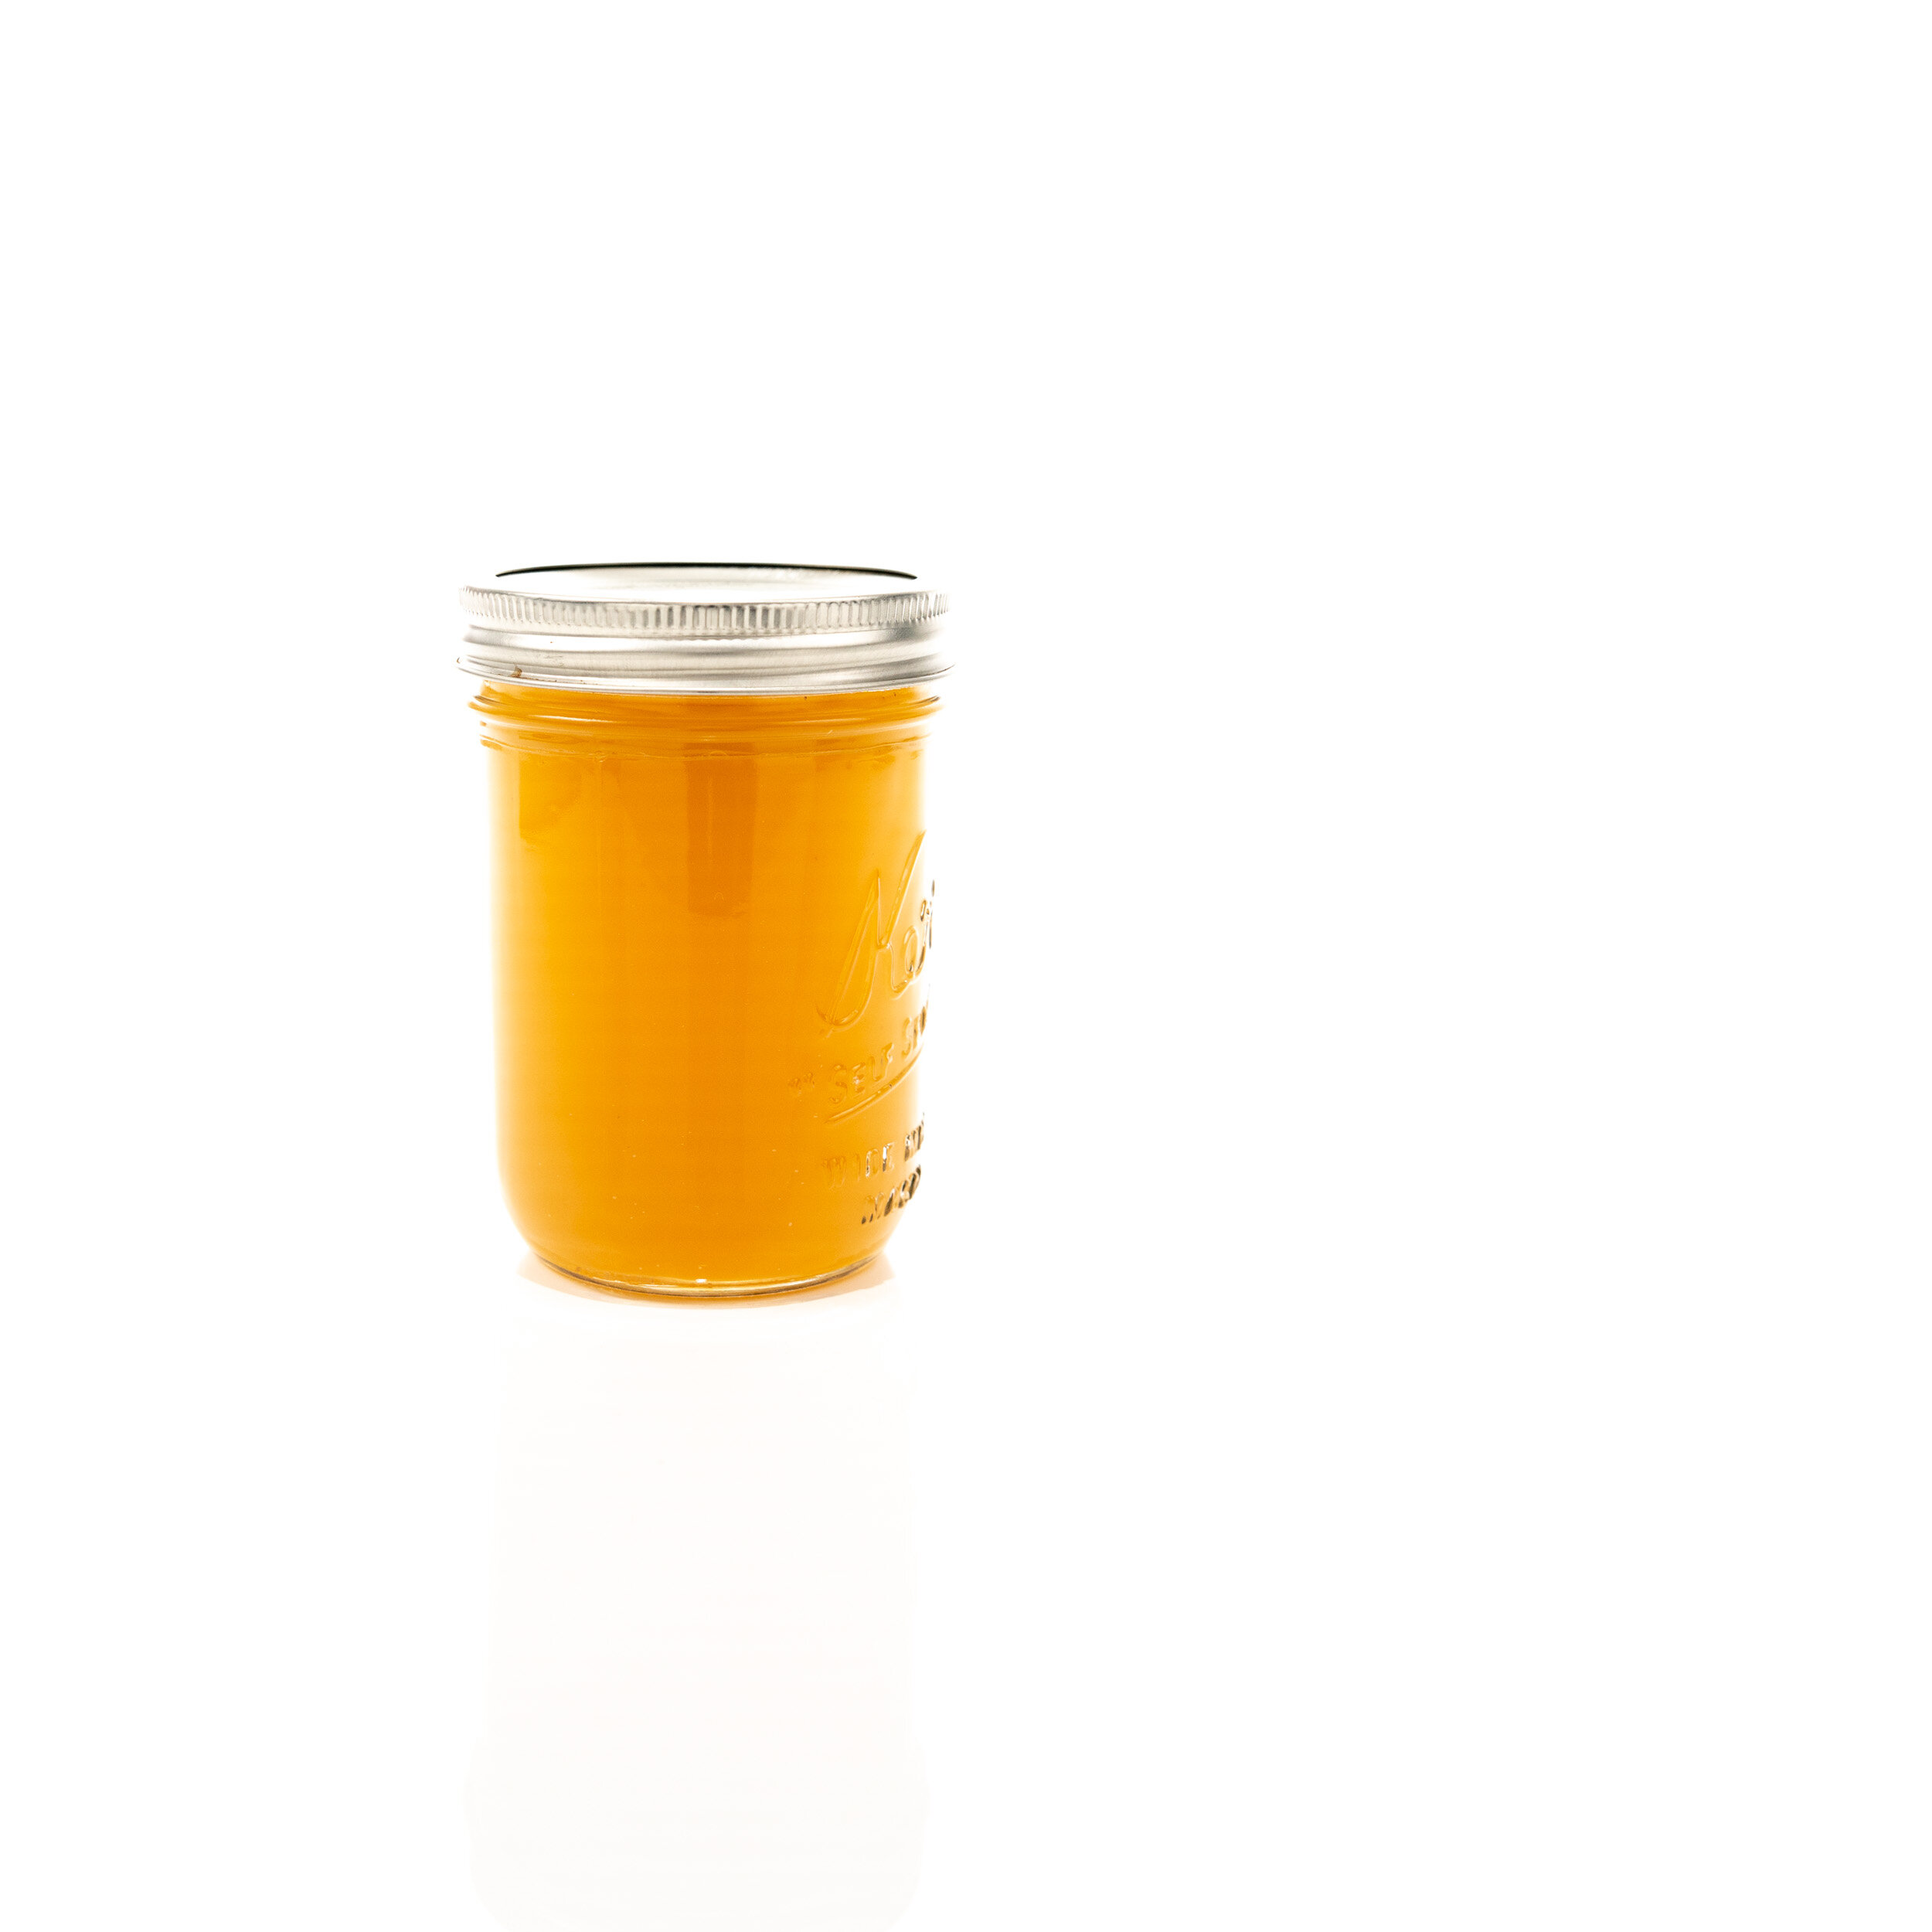
sign up below for updates!
↓↓↓


